Showing posts with label homemade. Show all posts

Friday, July 27, 2012

King Arthur Flour Hearth Bread

Pin It Now!
I am a bread-a-holic.  If I weren't on a diet, my diet would be comprised solely of carbs.  When I worked in Tustin, CA, I was conveniently down the street from a store called Claro's.  It was an italian food shop where you could get imported pastas, olive oils, canned san marzano tomatoes, as well as access to the very popular deli where they would make sandwiches right there for you, and their bakery full of italian breads and cookies and desserts.  One of the things I would go there specifically for was their crusty italian bread.  We don't know the name of it, but it was dark, it was crusty, and it was GOOOOOD!  My husband and I were very good at having half the loaf (it was a large loaf too) gone before we got home from there, if we went down there together.  It is such a happy store.  It is probably the best crusty bread ever, and now I am on a mission to find something that taste like it, and has the crusty happiness.  We think it might only be completely achieved when we get our wood fired pizza oven we lust after, but I figured I should give it a go anyways.

Research led me to my favorite baking site, King Arthur Flour and their Hearth Bread recipe.  This is their go to, traditional, on the back of their flour bags, recipe.  I opted for the version that was supposed to give a crustier, lighter product.  We only waited like two minutes after it came out of the oven to try it, but it definitely had the flavor of the bread from Claro's and a slight crustiness, but when I say Claro's bread is crusty, I am talking 1/4 inch of crispy, flaky bready crusty goodness (the kind where you happily eat the middle out of the slice of bread, then kind of munch of the crust).  This stuff left us, our laps, and our car covered in crumbs, but it was so worth it.  Mine may have been at a disadvantage because between baby and picking up our toddler at preschool and getting lunch, it may have over risen.  Fear not though, I am going to give it another try and see if I can get it any crustier.  The flavor was spot on though.

This is a fairly simple recipe, and anyone who likes good, simple, rustic bread, should definitely give it a try.  The only thing I changed was the addition of 1 1/2 tsp of diastatic malt powder, but that is a specialty item that you needn't worry about.

This is what it looked like when it came out.  It spread out quite a bit, and they ran in to each other.  My shaping wasn't the prettiest, but the good news is, that does not affect taste :)  Make sure you leave enough room between them.  As you can probably tell, we had already dug in by the time I could whip my camera out.


This would make fantastic garlic bread or panini sandwich bread if you cut it parallel to the table horizontally.  Oh my gosh would it be good....or pizza toppings and put under the broiler....or the good old stand by: cut it in big hunks and dig in!

King Arthur Flour's Hearth Bread (from their site)


Makes 2 loaves, 8 servings each, for a total of 16 servings


1 tablespoon (1 packet) active dry yeast
1 tablespoon sugar
1 tablespoon salt
2 cups warm water (not over 110°F)
5 1/2 to 6 cups King Arthur Unbleached All-Purpose Flour
cornmeal
boiling water

To mix: Mix together the first four ingredients. Let this stand until the yeast, sugar and salt are dissolved. Gradually add the flour to the liquid and mix thoroughly until the dough pulls away from the sides of the bowl. Turn the dough out onto a floured surface to knead. (This may be a little messy, but don't give up!)

Knead It: Fold the far edge of the dough back over on itself towards you. Press into the dough with the heels of your hands and push away. After each push, rotate the dough 90°. Repeat this process in a rhythmic, rocking motion for 5 minutes, sprinkling only enough flour on your kneading surface to prevent sticking. Let the dough rest while you scrape out and grease the mixing bowl. Knead the dough again for 2 to 3 minutes.

Let It Rise: Return the dough to the bowl and turn it over once to grease the top. Cover with a damp towel and keep warm until the dough doubles in bulk, about 1 to 2 hours.

Shape it: Punch down the dough with your fist and briefly knead out any air bubbles. Cut the dough in half and shape into two Italian- or French-style loaves. Place the loaves on a cookie sheet generously sprinkled with cornmeal. Let the loaves rest for 5 minutes.

Bake it: Lightly slash the tops of the loaves 3 or more times diagonally and brush them with cold water. Place on rack in a cold oven with a roasting pan full of boiling water on the oven bottom. Bake at 400°F for 35 to 45 minutes, until the crust is golden brown and sounds hollow to the touch.

For a lighter, crustier bread, let your shaped loaves rise for 45 minutes. Preheat the oven and roasting pan with water to 500°F for 15 minutes. Brush the loaves with cold water, place in the oven and bake for 10 minutes. Lower the temperature to 400°F and bake for 10 more minutes. Remove from the oven, let cool and devour!

For a heartier, more nutritious bread, substitute 2 cups of King Arthur Traditional Whole Wheat Flour for 2 cups of King Arthur Unbleached All-Purpose Flour.

Nutrition:


1 serving (based on 5 1/2 cups flour used)-- Calories: 140 Carbs: 31g Fat: 0g Protein: 4g Fiber:1g


Saturday, July 21, 2012

Curious Liam's 3rd Birthday Party

Pin It Now!
Today was the day!  The day my weeks and weeks of research (Ok...hours of research on Pinterest...I confess!), supplies collecting, baking, and crafting finally paid off.  Today was my son's 3rd birthday party!  We decided to go with a Curious George theme for several reasons.  One, my son acts more like a monkey than a toddler.  Two, he watches the Curious George shows ALL the time.  I have seen every one.  MANY times.  And there are probably 100 episodes.  At least.

Thanks to the help of my sisters, my mom and dad, my husband, and my mother-in-law, plus several borrowed items from other family members, we were able to pull off a reasonably successful birthday party I believe.

 Here are goody bags we did for the kids.  They had Curious George gummy snacks, glow stick bracelets, crayons, and a Go-Go applesauce squeezer.  Kind of random, but they were affordable, useable, and not completely comprised of junk food (though that is never a bad kind of gift bag).  We wrote the names of the kids on them before they left.
 Here is our "picture wall."  My dad is a professional photographer, so I tried to give him a decorated spot in which to take pictures of the guest with the birthday boy.  I love pictures (can you tell?  There are one or two here).
 My incredibly talented sister painted Curious George.  He was life size, and a dead ringer for the cartoon George.  My son was just enamored and amused and thrilled to have George at his party, and he made for cute pictures!!
 Got to have a close up.  My son has always kind of lived a monkey themed life.  We will never theme our kids room etc. after monkeys again though.  We had his nursery done in monkey theme, and all the stuff we got him  before he was born was monkey themed, and we ended up getting a baby/infant/toddler that sometimes acts more monkey than kid.  The next baby we had, his theme: Winnie the Pooh.  A nice, relaxed, laid back character :)
 Cupcake toppers!  All the printed designed items were from Photo designz  on Etsy.  Great great value, and the printables were fantastic!
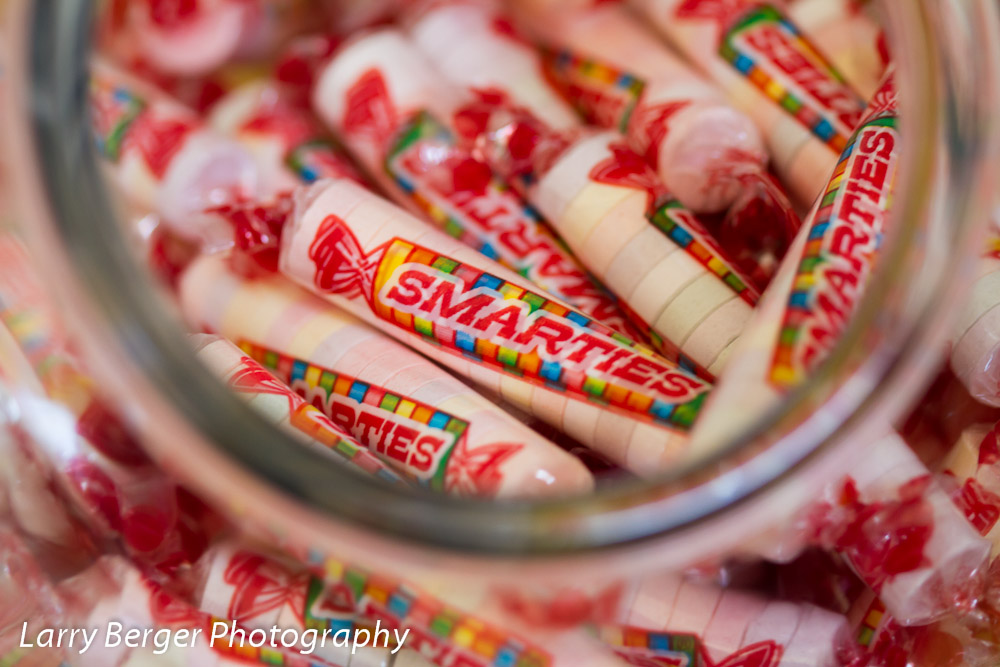
 His favorite candy...these and Starbursts.
 This banner was a pain.  It went so much better in my head than it did in real life.  That said and done, after many re-doings of tape and string, we got it up, and I absolutely loved it.  The whole thing said "Happy 3rd Birthday"
 Happy!
 This is a family staple at parties.  It is our version of 7-layer dip, affectionately dubbed "Dave's dip" for the uncle that brought the recipe home from home economics class one day.  Today, it was Jungle dip!  (Those are olives on top...just sayin'.  I thought I bought sliced...oh well.)  We did these individual servings and had individual brown paper bags of chips to go with them.  Portable, individual, and tasty!  Bring on the double dipping to your hearts content!
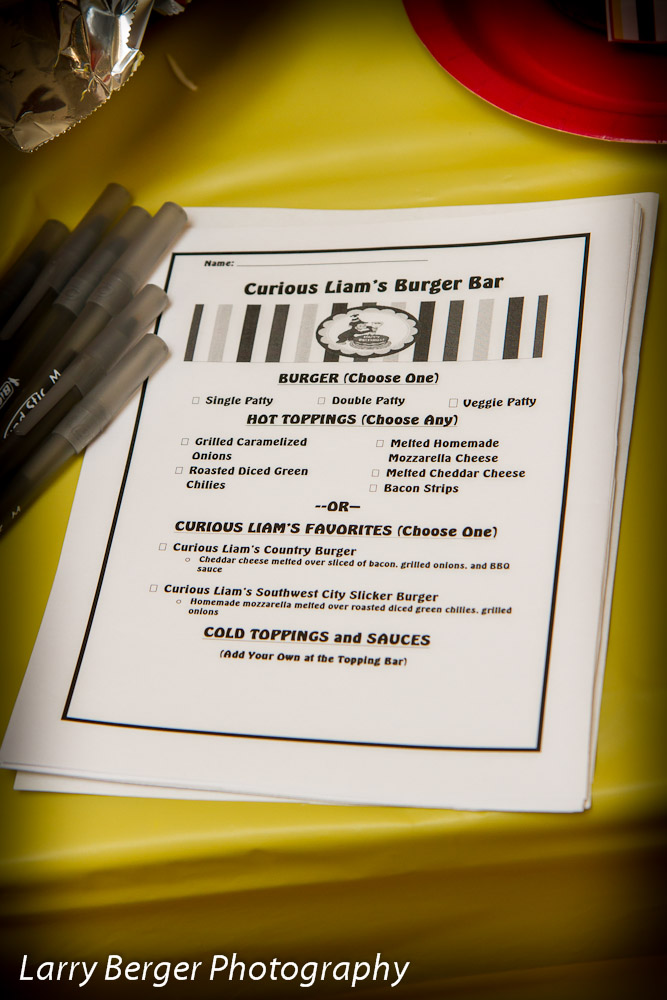
 We served burgers for lunch.  This is a shot of the menu that I made for people to order their burgers.  They got to choose from a single or double patty (or veggie), their choice of hot toppings (bacon, green chilies, caramelized onions), and cheese (homemade mozzarella, cheddar cheese).  We also made up two "Curious Liam Specials."  The guests marked down the toppings they wanted, and we cooked to order.  Then they got to help themselves to the cold toppings bar we had out also.  Homemade hamburger buns, homemade BBQ sauce, homemade mozzarella cheese (yes, homemade.  There is a previous blog post on it if you don't believe me), caramelized grilled onions, roasted diced green chilies, maple bacon, cheddar cheese, and all the regular burger fixin's as well.  These made for some tasty burgers if I do say so myself. Sorry there isn't a picture...no waited long enough to eat their burger for a picture.  My husband the grill master slaved away (and I mean SLAVED away) at the BBQ for a long time in 95+ degree heat (not including the 450 degree heat of the BBQ) cooking all the onions, peppers, burgers, and bacon.  He was such a trooper and it wouldn't have been the awesomeness without his grilling expertise. 
 Homemade dill pickles. 
 This was fruit salad in little waffle cone bowls.  So good, so easy, and so fun!
 On to the desserts...I love desserts by the way.  This is the cupcake spread.  We had vanilla with meringue frosting, and devils food cupcakes with meringue frosting.  The cupcake toppers were part of the printables package from Print Designz, as well as the buffet labels.
 Close up!

 I made caramel apples with chocolate and white chocolate drizzle for party favors for the adults.  Homemade caramel for them of course.  This was one of my favorite parts of the whole party spread, I was so happy with them.
 I was lucky enough to find monkey cupcake liners.  Who knew, right?
 For a monkey party, you must have banana something.  My banana something--frozen chocolate dipped bananas.  Some were plain, some were rolled in peanuts, and some were rolled in Reese's peanut butter cup morsels.
 The whole dessert spread table. 
The last dessert we had was vanilla milkshakes.  I made homemade chocolate sauce, and homemade caramel sauce (Oh my gosh...I wish I could have an I.V. of that caramel sauce...) for people to drizzle in if they wanted to flavor it.  These were a big hit and were gone as soon as I turned my back.  It was funny.

I tried to get the best deal on everything, and spend the least amount I had to while getting what I really wanted.  This involved many trips to Walmart (the shake cups, trays, candy jars, ribbon, and colored table cloths all Walmart, and under a dollar each), Target (napkins, dessert and appetizer plates), Sam's (squeeze bottles, cups for the dip, red dinner plates), and more stores too.  It was so nice to have a themed party, but not have it looked like Party City threw up in my house.  My goal was to not have it look like that happened, and I am happy with the outcome.

We also had a Curious George bounce house from www.jumpforfun.com out in our backyard.  This was the best money spent on the whole day!  Our son was over the moon!  He bounced and bounced and just had a blast.  I highly recommend splurging on one if you have an energetic child like we do.  It just made him so happy. 

A gigantic thank you to Larry Berger Photography, who took all these dazzling and drool worthy pictures.  A picture is worth a thousand words, and these all say "Yummy yummy yummy!!"

Overall, it was a lot of work, a lot of research, a lot of driving to a million different stores to get the best deal (I bargain searched, I really tried to do this as inexpensive as possible), and a lot of man hours.  In the end, it was SOOO worth it.  I think our son had a great time, he enjoyed the bouncer, the presents, the blowing out of birthday candles, and probably all the attention in general.  Heck, for a 3 year old, I guess you can't expect much more :)

Happy Birthday Curious Liam!  


Thursday, July 19, 2012

Party Favor Caramel Apples--Sneak Preview

Pin It Now!

Here is a little teaser from my son's 3rd birthday party coming up on Saturday.  I made these to give as party favors for the guests.  Homemade caramel with chocolate and white chocolate drizzle.  I can't wait for his party!  There will be a nice long post with lots of pictures but for now, I leave you with this :)

Tuesday, July 17, 2012

Chewy Oatmeal Cookies

Pin It Now!

I hate oatmeal.  Like the mushy, soupy, texture like its already been chewed kind of oatmeal.  So when I was told I needed to eat oatmeal to help with nursing my 10 month old, I had to find a more palatable way to ingest it.  So here it is.  Chewy, crisp, airy oatmeal cookies.  This is an oatmeal bandwagon I can be all over :)  I got this recipe from my favorite guilty pleasure, King Arthur Flour.  I modified the Oatmeal Cookie recipe just a tad to up the oatmeal factor, and the health factor (these tasty morsels only have 64 calories each!)

Recipe:


  • 1/2 cup (8 tablespoons) unsalted butter
  • 1/2 cup light brown sugar
  • 1/4 cup granulated sugar
  • 1 teaspoon vanilla extract
  • 1 1/4 teaspoons ground cinnamon
  • 1/8 teaspoon ground nutmeg
  • 1/2 teaspoon salt
  • 1 teaspoon cider or white vinegar (put it in, you won't be sorry)
  • 1 large egg
  • 1/2 teaspoon baking soda
  • 1/2 cup King Arthur Unbleached All-Purpose Flour
  • 1/4 Oat Bran (I got mine from Trader Joe's)
  • 1 1/2 cups rolled oats, quick cooking or old-fashioned
  • 1 cup golden raisins, optional (I don't do raisins, but feel free.  Chocolate chips are good too)
Directions:


1) Preheat the oven to 350°F. Lightly grease (or line with parchment) two baking sheets, light-colored preferred.

2) Beat together the butter, shortening, sugars, vanilla, cinnamon, nutmeg, salt, and vinegar until fairly smooth; a few tiny bits of butter may still show. 

3) Beat in the egg, again beating until smooth. 

4) Add the baking soda, oat bran, and flour, beating until well incorporated. 

5) Add the oats (and raisins), stirring to combine.

6) Drop the dough by 2 tsp (#60 cookie scoop)  balls onto the prepared baking sheets. Space the cookies 2" apart; they'll spread.

7) Bake the cookies for 11-12 minutes, reversing the pans halfway through (top rack to bottom, bottom to top). For softer cookies, bake the lesser amount of time; for crunchier, the longer amount. 

8) Remove the cookies from the oven, and let them cool right on the pan.

Yield: Approx. 34 cookies.

 Serving Size: 1 cookie  Servings Per Batch: about 34 Amount Per Serving: Calories: 64 Total Fat: 3g  Total Carbohydrate: 9g Dietary Fiber: 1g  Protein: 1g

Sunday, July 15, 2012

Homemade Dill Pickles

Pin It Now!

No, not the annoying baby brother of Tommy Pickles from the Rugrats cartoon (my son is currently obsessed with this '90s throwback).  I am talking about yummy, vinegar soaked cucumbers.  No glowing neon green liquid here, these are fresh, flavorful, and SO easy!  This recipe is from Bobby Flay's Cuban Sandwich Recipe on foodnetwork.com.  I didn't have all the fresh dill and whole seeds for the spices, so I just subbed a small amount of the ground spice equivalent, including garlic.

These will go great with homemade hamburgers.  If you go through the trouble of making everything from scratch for a crazy good burger experience (yes, I am one such crazy person), why not go all the way with homemade pickles too.  These happen to be for my son's upcoming birthday party for his "burger bar" lunch.  Perfect compliment to hand formed burger patties, homemade hamburger buns, homemade mozzarella cheese, homemade condiments and a variety of other happy toppings.

Homemade Pickles:

  • 3 Kirby cucumbers, sliced into 1/8-inch thick slices (I made 1-1/2 recipes worth of vinegar solution, and used 12 mini cucumbers, 3-4 in. long, and put them in 4-16 oz canning jars)
  • 3/4 cup packed coarsely chopped fresh dill (if you don't have it, skip it and add more dill seeds)
  • 3 tablespoons sugar
  • 2 garlic cloves, coarsely chopped (1/4 to 1/2 tsp garlic powder)
  • 2 teaspoons kosher salt (make sure it does not contain iodine, that will make the pickles cloudy)
  • 3/4 teaspoon dill seeds (I put more since I didn't have fresh dill on hand, maybe 1-1/4 tsp)
  • 1/2 teaspoon whole mustard seeds (1/4 tsp ground Coleman's mustard powder)
  • 1/2 teaspoon coriander seeds (1/8 tsp powder)
Put the sliced cucumber in a medium bowl (which has a fitted lid).
Combine 1 cup of water, the vinegar, dill, sugar, garlic, salt, dill, mustard and coriander seeds in a small saucepan over high heat and bring to a boil. Cook until the sugar and salt is dissolved. Remove from the heat and taste for tartness, add more sugar if too sour and let cool to room temperature.
Pour the cooled liquid over the cucumbers, cover and refrigerate for at least 4 hours and up to 48 hours, stirring the mixture at least once.
 *According to research, these should last several months in the fridge as long as you use good cucumbers that were not rotting already or had soft spots.  

Wednesday, July 11, 2012

Nutella Oreo Truffles

Pin It Now!

Having made homemade nutella the day before, I was then presented with the dilemma of what to do with all that nutella.  Make truffles of course!  I had some fantastic oreo truffles at a family get together on fourth of July, and thought that those may be something that could work with the nutella instead of cream cheese (we don't eat a lot of cheese products or dairy products in our house for the most part).  So I said what the heck, and went to work.

These did not come out as moist as the ones with cream cheese, they were more cake-like than truffle like.  I think that can be remedied by adding more nutella (my homemade nutella was not as thin in consistency as store bought, so if you use store bought, that may help negate having to add extra).  Moist or cakey, they were still tasty!  Not too strong on the hazelnut flavor, but if you were real adventurous you could stick a whole toasted hazelnut in the center.

Here is the recipe, adjust the amounts to suit your desired consistency.

Recipe:

Makes approximately 49 truffles

11 oz homemade nutella spread or store bought (adjust amount for desired consistency)
1 15 oz package oreo cookies
14 oz semi sweet-chocolate chips, white chocolate chips, or dark chocolate chips (I used semi-sweet)

Directions:

  1. In a food processor, process the oreo cookies in to a fine crumb.
  2. Add in the nutella and process until the mix comes together.
  3. Using a 2 tsp cookie scoop, scoop out the mix (make sure to press it into the scoop well), release the mix into your hand and compress and roll into a ball.  Place on cookie sheet lined with parchment paper.
  4. Once all the mix is rolled out, melt the chocolate chips in a microwave safe bowl in 30 second intervals until melted.
  5. Using two forks, roll each ball in the chocolate, remove excess, place back on lined cookie sheet.  
  6. When finished, sprinkle some crushed oreos over the top if desired.
  7. Place in fridge to set.  Store in fridge.

Nutrition (as written):

Calories: 106 cal
Fat: 6 g
Carbs: 14 g
Protein: 1 g
Fiber: 1 g


Tuesday, July 10, 2012

Homemade Dark Chocolate Nutella Spread

Pin It Now!


Here is another confession--I was buying jars of nutella, and eating it straight out of the container with a spoon.  No time to pass go, or spread it on anything that has redeeming health qualities.  Nope.  Straight from the jar.  And man, when I got to the bottom, it was no joke.  I would scrape, lick, and scoop every last morsel of nutella goodness out of that jar.

Then sadness....I couldn't find it on sale, I couldn't find coupons.  I could not justify the $3.50 for a little jar that would last me not enough days.  Then one day, I saw on pinterest, "Homemade nutella."  Really?  Could it be?  Can it be possible to make it at home.  Well I am here to tell you that yes it is.  I modified the recipe I found on Seemingly Greek to develop this recipe.

Granted, it isn't quite as silky smooth, and not as sweet (if you use milk chocolate it probably would be), but it has such a wonderful, fresh hazelnut flavor, and rich chocolaty goodness, I am quite satisfied.

This is currently slated to be used to make my next endeavor....nutella oreo truffles.  Yes, you heard right.  Nutella. Oreo.  Truffles!  How could you go wrong, right??  Well, I'll let you know :)

In the mean time, here is the recipe.

Recipe:

Makes 15-16, 2 Tbs servings (about 600 grams or 23 oz total)

2 cups (240 grams) hazelnuts, toasted and peeled (I used Trader Joe's large hazelnuts)
1-1/2 cups powdered sugar
1/2 cup dutch process cocoa powder
6 oz (or however much you need to get the consistency you want) evaporated 2% milk
1 Tbs refined coconut oil, or another flavorless oil
1.65 oz Trader Joe's 72% cocoa chocolate bar (or any kind of chocolate you want), melted
1/4 tsp vanilla extract
1/8 tsp salt

Directions:

  1.  Toast hazelnuts on the stove top in a dry saute pan over medium low heat until slightly browned and fragrant.  Do not burn.
  2. Peel the skins from the hazelnuts and place in food processor.
  3. Pulse with the coconut oil until it is finely ground.
  4. Add remaining ingredients, but start with only about 3 oz. of the milk.  Add more to get the desired consistency.
  5. Blend in food processor until smooth and mixed and desired thickness.
  6. Store in air tight container in the fridge.  
  7. Enjoy on toast, in graham crackers, fruit, or just by the spoonful!
I am not sure how long it lasts in the fridge with the evaporated milk in it, but if anyone knows, feel free to drop it in the comments.

Sunday, July 8, 2012

Homemade Finger Paints

Pin It Now!

Win one for Pinterest!  I found a tutorial on Pinterest for homemade finger paints at The Daily Buzz.  It was really easy and I had everything so I thought I would make it for Liam to finger paint in the bath with.  That way I could let him play, and hose him down all in one shot. 

Recipe:

3 Tbs sugar
1/2 tsp salt
1/2 cup cornstarch
2 cups water
food coloring

Directions:

Combine everything in a pot, heat and stir until mixture thickens. You will know when it happens because all of the sudden it will go from white and thin, to opaque and thick like frosting.  Remove from heat.  I divided it up and put it in a muffin pan, put a few drops of various food coloring and stirred well. 

Put Liam in the bath, gave him some paint brushes (didn't want it on his fingers, go figure!), and told him to go to town.  He is thoroughly enjoying it.  I enjoy knowing what's in it, and that if he ingested it, it would cause him no harm.

Enjoy!!!

Thursday, June 28, 2012

Chocolate Covered Apple Pie Caramels

Pin It Now!

I know I know, my pictures suck.  I am working on it, and they will hopefully get better soon. 

Now that that is out of the way, here is a new recipe I found from Blondie's Cakes called Apple Cider Caramels.  Could it be, the best of both worlds, together in one??  Yep!  After days of having this web page open on my computer...taunting me, I finally gave in last night and had to make them.

After a long time over the stove stirring, I was well rewarded.  These little caramel gems taste like apple pie, stuffed in a chewy, rich caramel.  That is all well and good, but I thought it could be better.  So I dipped them in semi-sweet chocolate too.  Now are are talking apple pie meets chocolate and caramel covered apple.  Happy, happy day!  I covered half, left the other half naked, and I enjoy them either way.  This is definitely going in my holiday/special occasion recipe folder, because it just screams happy holidays! (Hey, fourth of july is a holiday, right?  Close enough.)

I modified the recipe ingredients a bit from the original, so here it is with the modifications.

CHOCOLATE COVERED APPLE PIE CARAMELS


Ingredients:

1/3 cup frozen apple juice concentrate, thawed
1 cup evaporated milk, 2%, divided (2/3 cup and 1/3 cup)
1 tsp ground cinnamon
Pinch nutmeg
1/4 tsp allspice
1 1/2 cup brown sugar
1/3 cup light corn syrup
1/2 cup real butter, cubed

Chocolate coating (to cover whole batch):

12 oz. semi-sweet, dark, or milk chocolate chips
1 tbs butter

Directions:


- Line an 8" square pan with parchment paper, making sure to leave about 1" hanging over the edges for easy removal.

- In a small bowl, combine 2/3 c. evaporated milk, cinnamon, nutmeg, allspice, and apple juice concentrate. Set aside.

- In a large, heavy saucepan, combine the sugar, 1/3 c. evaporated milk + enough water to reach the 1/2 c. line on the measuring cup, and corn syrup. Cook over low heat until the sugar dissolves. Insert the candy thermometer and simmer until the syrup reaches 234 degrees.

- Remove from heat and slowly whisk in the cream mixture. Add the cubed butter and stir until the milk and butter are fully incorporated. Return the pan to heat and re-insert the candy thermometer. Cook over low heat, stirring frequently, until the temperature reaches 246 degrees.

- Remove from heat and pour the caramel into the prepared pan. Let the mixture cool completely at room temperature or in the refrigerator. I covered the top of the pan loosely with saran wrap. I cut it into 64 squares.  Wrap each in wax or parchment paper and store in fridge, leave unwrapped in an air tight container in the fridge, cover in chocolate* and store in the fridge, whatever floats your boat.  Stores in fridge up to two weeks.

*To cover in chocolate, cut into desired sizes once cool.  Melt the coating ingredients together in 30 second intervals in the microwave until melted.  Using two forks, dip caramels in the chocolate and place on a parchment lined baking sheet.  Refrigerate until the chocolate sets.  Store in fridge.


Nutrition information (uncovered caramels, 64 servings)

  Calories-48  Carbs-9    Fat-2 g    Protein-0g


Wednesday, June 27, 2012

Chewy Chocolate Chip Peanut Butter Cookies

Pin It Now!

I love peanut butter.  I have a serving-a-day habit and see no signs of stopping.  I love chocolate chip cookies.  I couldn't find a recipe that gave me the peanut butter flavor with the chocolate chip cookie texture that I loved.  Well, I am happy to say, I managed to marry the best of both worlds.  Enjoy!

PS-If you are adventurous, add some mini Reese's peanut butter cups, or peanut butter chips.  YUM!

Lindsay's Chewy Peanut Butter Chocolate Chip Cookies


 Servings: 36

Cooking Times:
Preparation Time: 10 minutes
Cooking Time: 10 minutes

Oven Temperature: 375°F

INGREDIENTS:

1 1/4 cup brown sugar - (packed)
3/4 cup white sugar
1 stick butter, softened
2/3  cup peanut butter
2 eggs
1 1/2 teaspoon vanilla extract
2 1/2 cups flour
3/4 tsp baking soda
3/4 tsp salt
12 oz package semi-sweet chocolate chips


DIRECTIONS:

1. Cream together brown sugar, white sugar, peanut butter and butter.

2. Add the eggs and vanilla and mix well.

3. Add the flour, baking soda and salt and mix well.

4. Mix in the chocolate chips.

5. Drop by rounded spoonful onto an ungreased cookie sheet or a cookie sheet lined with parchment paper and bake for 10-12 minutes at 375 degrees until golden brown along the edges.


Nutrition Facts
Serving size: 1/36 of a recipe (1.3 ounces).

Amount Per Serving
Calories 155.51
Calories From Fat (37%) 57.03
Total Fat 6.73g 10%
Saturated Fat 3.05g 15%
Cholesterol 18.5mg 6%
Sodium 103.71mg 4%
Potassium 55.83mg 2%
Total Carbohydrates 22.3g 7%
Fiber 0.8g 3%
Sugar 12.13g
Protein 2.68g 5%

Sunset Perfect Pie Crust Recipe

Pin It Now! Sunset Perfect Pie Crust


Ingredients:

1 1/4 cup flour
1/2 tsp salt
3 1/2 Tbsp cold butter, cut into pieces
1/4 cup cold vegetable shortening
4-5 Tbsp ice water


Directions:

1. Mix the flour and salt in a medium bowl.
2. Cut the shortening into small pieces and add that and the butter pieces to the dry ingredients.
3. With a dough blender or a fork, cut the butter and shortening into the flour mix until the pieces resemble the size of peas.
4. 1 tablespoon at a time, add the ice water and mix with a fork, just until the dough holds together in a ball without cracking.
5. Wrap the dough ball in plastic wrap and flatten into a disk and place in fridge until chilled.
6. When ready to roll out pie crust, remove from fridge and roll out on lightly floured surface to the needed size.
7. Bake as required for desired recipe.

Servings: 8
Yield: 1 Pie crust for a 9" deep dish pie or shallow 10"

Oooolalallieberry Pie: AKA Crumble Topped Olallieberry Pie

Pin It Now!


Before anyone gets excited, I made this a while ago, so no need to come break into the house for it please, there is none here.  Now that that has been prefaced--no berry is probably better than an olallieberry.  Unfortunately, they are only in season for about a month, and not necessarily very available anywhere other than near Santa Maria.  I did happen to come across a berry stand that had them, and HAD to buy some.  I sort of when buck wild and spent a fortune and bought a bunch.  I promptly went home and tried to figure out how to make them into a delicious pie (can't go wrong putting them in a pie).

Now my aunt lives in Santa Maria and she can go pick the olallieberries right off the bushes on the farms when they are in season.  She makes jams, cobblers, pies and all sorts of sinful things with them that I could only dream of being half as good at making.  I will never live up to her berry baking abilities, but seeing as I can't just walk over to her house to steal a pie or a jar of jam, I was left to my own devices (it is like a 5 hour drive to her house, it would be a very long walk).

Here is what I came up with.  I am a fan of crumble pie topping, the brown sugar and butter laden happy crumbles, so I married that (from Ina Garten's Peach and Blueberry Crumble recipe) with a traditional pie crust (the origins of which are from my aunt, I believe it is the Sunset Perfect Pie Crust recipe) and the filling from my aunts boysenberry cobbler recipe.  I probably tweaked them all a little, but I am giving credit for the original recipes from whence they originated.

Beware--this is not for the health conscious, those opposed to butter, or those against sugar.  You have been warned.  And before anyone asks, no, I will not provide nutrition information for this recipe.  If you are going to make it, please just enjoy the splurge.

Oh yea, it also isn't too bad reheated and a big scoop of vanilla ice cream added on top.  Yep...not too bad at all.

Olalliberry Pie


Servings: 8
Yield: 1 pie

Cooking Times
Cooking Time: 45 minutes

Oven Temperature: 400°F

INGREDIENTS

FILLING:

1 cup sugar
3  Tbsp cornstarch (or King Arthur Flour Instant ClearJel)
6 cups olalliberries (or any other berry)
1 tsp grated lemon peel
1/2 Tbsp lemon juice
1/2 tsp cinnamon
1/4 tsp nutmeg

TOPPING:

1 cup flour
1/3 cup granulated sugar
1/4 cup brown sugar, packed
1/2 tsp salt
1/4 tsp cinnamon
1 stick cold unsalted butter, diced

PIE CRUST:

1  "Sunset Perfect Pie Crust Recipe"


DIRECTIONS

FILLING:

1. In a large bowl, combine the 1 cup sugar, cornstarch, lemon peel and lemon juice, along with the cinnamon and nutmeg.  Add in berries.
2. Mix gently to coat. Set aside.

TOPPING:

1. For the topping, combine the flour, granulated sugar, brown sugar, salt and cinnamon in a bowl and mix slightly.
2. Dice up the butter into small pieces and add to the dry ingredients.
3. Mix with a fork or break up butter with your fingers until the mixture resembles large crumbles.

ASSEMBLY:

1. Roll out one recipe of the "Sunset Perfect Pie crust" until it is large enough to cover the bottom and sides of the 9" pie pan.
2. Crimp edges as desired.
3. Pour in the prepared filling onto the pie crust.
4. Top with the crumb topping mixture, making sure not to press it down.
5. Bake in the oven at 400 degrees for 45 minutes, or until the top and crust is golden brown and the filling is bubbly.
6. Let cool before serving (Important!!!  Hard to do, but important!)


Monday, June 25, 2012

Crock Pot Pineapple Chicken

Pin It Now!

I love dumping dinner in a crock pot and forgetting about it until its time to eat.  Here is a recipe I created in my endeavor to figure out how to use up some jars of Dole pineapple chunks we had. (I have no picture of this currently, hence the crock pot stand in)

Crock Pot Pineapple Chicken

Makes 4 hearty servings

Ingredients:

  • 1 to 1-1/2 pounds boneless skinless frozen chicken breasts
  • 1 (20 oz) jar pineapple chunks in juice
  • 2 tablespoons low sodium soy sauce
  • 2 tablespoons hoisin sauce
  • 1 (10.5 oz) can rotel original tomatoes with green chiles
  • 1 (6 oz) can tomato paste
  • 2 tablespoons firmly packed brown sugar
  • garlic chili paste (optional, add up to 1 tbs is a spicier taste is desired)
  • salt and pepper to taste
For serving:
  • White rice, brown rice, quinoa or orzo 
Directions:
  1. Drain half of the liquid from the pineapple chunks and discard.
  2. Dump all ingredients except salt and pepper into crock pot and set on high 4 to 6 hours, or low 8 to 10 hours until chicken is easily shredded.
  3. Remove chicken when cooked and dice or shred.  Return to crock pot and allow to simmer for 30 minutes more.  
  4. Season with salt and pepper to taste.
  5. Serve over white rice, brown rice, quinoa or orzo.
Nutrition (based on 20 oz. of chicken):

Calories-287 Carbs-30   Fat-5 g     Protein-29 g  Fiber-2 g

Homemade Hot Buttered Pretzel Rolls

Pin It Now!


In my household, we are pretzel addicts.  And roll addicts.  So naturally, I managed to come up with the best of both worlds.  I make soft pretzels all the time, and this is the same dough, just in a roll.  Simple and easy and so very tasty.  I used to use a recipe that had a long rising time, and was very labor intensive and involved boiling the pretzels before they were cooked and it was really just a pain.  Then, in true King Arthur Flour fashion, I discovered that not only did they have an amazing soft pretzel recipe, it was simple too!!!  I made a few modifications to their recipe, but for the most part, it is their recipe for Hot Buttered Soft Pretzels .

First modification--Make a double batch.  No joke, 8 rolls will not be enough!  In the picture above, this was all that was left of a double batch by the time I had a chance to get my camera (which didn't take that long).

This recipe can be made dairy free by omitting the butter at the end or brushing with a dairy free vegetable spread like earth balance.

Hot Buttered Pretzel Rolls

Ingredients:

Dough


  • 2 1/2 cups King Arthur Unbleached All-Purpose Flour
  • 1 teaspoon salt
  • 1 teaspoon sugar
  • 2 1/4 teaspoons instant yeast
  • 7/8 to 1 cup warm water*
  • *Use the greater amount in the winter, the lesser amount in the summer, and somewhere in between in the spring and fall. Your goal is a soft dough.


Topping


  • 1 cup boiling water
  • 2 tablespoons baking soda
  • coarse, kosher or pretzel salt**, optional (but really fantastic)
  • 3 tablespoons unsalted butter, melted (I use smart balance to cut down calories, it doesn't take much)
  • **I didn't have pretzel salt and I couldn't really find it, so I bought some coarse sea salt that goes in a grinder (from Winco bulk bins) and pulsed it in a food processor to break it down just a bit, tastes much more like pretzel salt than kosher.

Directions:

Note:  I make dough by hand since my Kitchen Aid stand mixer is busted.  It may seem intimidating, but really, just knead it until it looks somewhat smooth ball (won't be perfect) and when you poke it quickly it springs back and the indent goes mostly away within 15 seconds or so.  It will be pretty sticky but just keep sprinkling it with a light dusting of flour until you have kneaded it to where it needs to be.

1) To make dough by hand, or with a mixer: Place all of the dough ingredients into a bowl, and beat until well-combined. Knead the dough, by hand or machine, for about 5 minutes, until it's soft, smooth, and quite slack (add more flour if it is too sticky, add more water a tablespoon at a time if it is too dry, it will be a fairly sticky dough to work with). Flour the dough and place it in a gallon ziploc bag, and allow it to rest for 30 minutes. 

2) While the dough is resting, prepare the topping: Combine the boiling water and baking soda, stirring until the soda is totally (or almost totally) dissolved (be careful, when good baking soda hits hot water it bubbles and expands, so add slowly). Pour mixture into a 9" square pan and set the mixture aside to cool to lukewarm (or cooler). 

3) Preheat your oven to 475°F. Prepare a baking sheet by spraying it with vegetable oil spray, or lining it with parchment paper. 

4) Transfer the dough to a lightly greased work surface, and divide it into eight equal pieces (about 70g, or 2 1/2 ounces, each) and shape into balls.

5)Working with 4 pretzels at a time, place them in the pan top side down with the baking soda/water, spooning the water over their tops; leave them in the water for 2 minutes before placing them on the baking sheet. This baking soda "bath" will give the pretzels a nice, golden-brown color and their characteristic pretzel flavor. 

6) Transfer the pretzels to the prepared baking sheet. Sprinkle them lightly with coarse, kosher, or pretzel salt, if desired. Allow them to rest, uncovered, for 10 minutes (important, don't skip!). 

7) Score the top of each roll with two parallel cuts using a sharp knife.  Bake the pretzels for 10 to 12 minutes, or until they're golden brown. 

11) Remove the pretzels from the oven, and brush them thoroughly with the melted butter.  Eat the rolls warm, or reheat them in an oven or microwave. 

Yield: 8 rolls.


Nutrition information (*with butter topping) 

Serving Size: Servings Per Batch: 8 Amount Per Serving: Calories: 171 Calories from Fat: Total Fat: 4.7g Saturated Fat: Trans Fat: . Cholesterol: 12mg Sodium: 888mg Total Carbohydrate: 27g Dietary Fiber: 1g Sugars: 1g Protein: 4g. 

* The nutrition information provided for this recipe is determined by the ESHA Genesis R&D software program. Substituting any ingredients may change the posted nutrition information.

Sunday, June 24, 2012

Homemade Mozzarella Part II

Pin It Now!

There can be many motivations for wanting to make homemade mozzarella.  Here is ours.  Homemade, from scratch pizza.  We make our dough from scratch.  Now, we make our cheese too!  Here is an example of what the pizzas look like with the mozzarella.  This one happens to be for my mother in law, its a cheese and zucchini pizza.  See the charred, bubbly goodness???  That is the product of my husband standing in the 90 degree weather in front of a BBQ at 10 am this morning cooking it.  The only better way to cook a pizza...wood fired pizza oven.  Someday.


Above is the pizza dough, freshly made this morning, just begging to be stretched into yummy pizza goodness.  When cooked on the BBQ, the crust is cracker-thin, bubbly, chewy, crispy, light, airy, and full of flavor.  The cheese....OMG, the homemade cheese melted incredible and was so much better than store bought.  Never will I buy store bought mozzarella again.


Here is the pizza before it goes out onto the BBQ.


Can you see it?  The monster bubbly on the back edge of the pizza??  Some may think that is not a good thing.  In our house...we fight over that piece!  Bubbles rock!

Overall, this morning was a very successful pizza making endeavor.  Until....we ran out of propane.  With one and a half pizzas left.  Tear :(  One had to be finished in the oven, and one had to be complete cooked in the oven.  The above picture is of the one that came out of the oven.  It still looks fine, but it just isn't the same charred, bubbly, smoky goodness of one off the BBQ.

I can't wait until we can get a pizza oven.  If anyone wants to donate to the "husband needs a pizza oven" fund, send me an email, and we can arrangement :)  Once we have one, I promise there will be weekly pizza block parties for anyone who wants to join!
Related Posts Plugin for WordPress, Blogger...