Showing posts with label dessert. Show all posts

Wednesday, December 12, 2012

Graham Cracker Pretzel Salted Toffee

Pin It Now!

I don't have a lot to say other than "MAKE THIS!!  And make A LOT!" because it will be gone before it even sets up all the way, I guarantee it.  I am a die-hard toffee fan, second only to my love of chocolate truffles, and this stuff has blown my idea of toffee out of the water.  It is the perfect blend of sweet, caramel goodness, and salty blissful savoriness.  Really, match made in heaven.  I really ate probably a tenth of the tray before the chocolate even solidified.  I must get this out of the house, lest I gain ten pounds because I ate it all by tomorrow.  I know the pictures are not great, but I was afraid if I waited until tomorrow, there may be nothing left to take a picture of.


I know it may seem a little weird, the graham crackers and all, but I promise, on my crock pot and my hand mixer, that you will love it.  I implore you to pin this, make this, and share this with those you love...it will make the world a brighter place.  Ok, maybe it won't, but you will have a smile on your face!


GRAHAM CRACKER PRETZEL SALTED TOFFEE
(Adapted from Six Sister's Stuff's Saltine Cracker English Toffee)

Ingredients:

  • 15 graham cracker sheets
  • 1 cup (2 sticks) butter
  • 1 cup brown sugar
  • 1/2 teaspoon sea salt
  • 1/2 teaspoon vanilla extract
  •  2 cups semi-sweet chocolate chips
  • 1-1/2 cups crushed pretzels
Directions:

  1. Preheat oven to 400 degrees.
  2. Line a baking sheet with aluminum foil.
  3. Lay the graham cracker sheets side by side in the pan, it should end up being five across and three rows long.
  4. In a saucepan, melt the butter, salt, and brown sugar over medium heat. Bring it to a boil and let it boil for three minutes without stirring. After three minutes, remove from heat, add the vanilla and stir in quickly, then pour the hot brown sugar mixture evenly over the graham crackers.  Use the spoon to spread it out a bit if needed.
  5. Bake in the preheated oven for 5-7 minutes, until bubbly.
  6. Remove from oven and sprinkle with the chocolate chips.  Let them melt for a few minutes and then use a knife or spatula to carefully spread the chocolate out evenly over the toffee.
  7. Sprinkle with the crushed pretzels and press them in to the chocolate slightly.
  8. Let it cool completely on the counter or in the fridge.  When set, break the toffee into two-bite pieces and enjoy!
  9. Store in an air tight container for 1-2 weeks or in the freezer for a few months (HA!  Like there will be any left to store....).

Tuesday, December 4, 2012

Candy Cane Oreo Fudge

Pin It Now!

I have been craving something chocolatey.  Like that luscious, smooth, melt in your mouth heavenly chocolatey.  After seeing a run of wonderful looking fudge recipes, I decided to venture into uncharted territories for me, and try my hand at fudge.  I did lots of research, called my mom and asked about her fudge recipe she has been using for as long as I can remember, and took to my favorite bloggers' sites.  What has resulted is kind of a mish-mash of parts of each of the recipes I saw, inspiration, if you will, for this recipe.

It turned out better than I could have ever hoped.  It was silky smooth fudge, studded with lovely little bits of oreo and candy cane pieces, and not overwhelming on the peppermint either.  Super easy to make, and just down right addictive.  


CANDY CANE OREO FUDGE
(Inspired by Something Swanky's Peppermint Oreo Fudge and highly adapted from Chocolate, Chocolate, and More's Milk Chocolate Fudge)

Ingredients:

Chocolate Oreo layer:
  • 3 cups semi sweet chocolate chips
  • 1 can sweetened condensed milk (14 oz)
  • 2 tsp vanilla extract
  • 2 cups broken up oreo cookies (left in reasonably large chunks)
  • 1/2 of a 7 oz. jar marshmallow fluff
White Chocolate Candy Cane Layer:
  • 3 cups white chocolate chips
  • 1 can sweetened condensed milk (14 oz)
  • 1/2 tsp peppermint extract
  • 1 cup crushed peppermint candy canes
  • 1/2 of a 7 oz. jar marshmallow fluff
Topping (optional):
  • crushed oreo cookies
  • crushed candy canes
Directions:
  1. Line a 9x13 baking dish with parchment paper and set aside.
  2. In a medium sauce pan over LOW heat, melt the semi sweet chocolate chips with the can of sweetened condensed milk.
  3. Once this is smooth and completely melted, remove from heat, add the vanilla extract and the marshmallow fluff and stir until completely combined.
  4. Add the oreo cookie pieces and stir until evenly distributed.  Pour into prepared pan and spread evenly over the bottom.
  5. In another sauce pan melt the white chocolate chips with the condensed milk until smooth and completely melted.
  6. Remove from heat and mix in the peppermint extract and the marshmallow fluff until well combined.
  7. Add in the candy cane pieces and mix until evenly distributed.
  8. Pour this mix over the chocolate oreo layer in the baking dish, and spread in an even layer.
  9. If desired, sprinkle with crushed oreo cookies or candy cane pieces, or both.
  10. Place in fridge until set, about 4 hours or over night.
  11. Cut in to pieces and enjoy.  Keep refrigerated.

Monday, November 19, 2012

Salted Caramel Pecan Shortbread Bars

Pin It Now!

I don't really have any profound comments for this recipe, other than I just really wanted to combine pecans, caramel, shortbread and chocolate into something  delicious.  They were delicious!


I owe my mom and dad a big thank you though, because they got me a food photography "How-To" book, that I immediately read upon receiving.  I had to make something today so that I could try out all the tips, so that was really motivating my baking today.  Sadly, by the time I was done baking, I had lost almost all the daylight, but I worked with what I had, I will have more chances to practice.  It was so fun to implement what I learned, and hopefully my photos will continue to improve.

Salted Caramel Pecan Shortbread Bars

Ingredients:


Shortbread:
(Adapted from The Joy of Baking's Shortbread Cookies)
  • 1 cup (2 sticks) butter, softened
  • 1/4 cup powdered sugar
  • 1/2 cup brown sugar, packed
  • 1-1/2 teaspoon vanilla extract
  • 1-1/2 cups all purpose flour
  • 1/2 cup corn starch
  • 1/4 teaspoon salt
Caramel:
(Adapted from Chewy Caramel from All Recipes)


  • 1 cup butter
  • 1 pound light brown sugar
  • 1 (14 ounce) can sweetened condensed milk
  • 1 cup light corn syrup
  • 1 pinch salt
  • 1 1/2 teaspoons vanilla extract
Other:
  • 8 ounces roasted and salted pecan halves, broken up
  • 12 ounces semi-sweet chocolate chips
  •  course sea salt
Directions:

Shortbread:

  1. Line a 9x13 in. baking dish with parchment paper.  Make sure it extends up all four sides.  Preheat oven to 350 degrees F. 
  2. In a medium bowl  cream butter until smooth and creamy.  Add sugars and cream together for another minute, until smooth.  
  3. Add the vanilla and beat until incorporated well.
  4. Add the flour, corn starch, and salt and mix until just combined.
  5. Using your hands or a spatula, press the dough into the prepared pan until it is evenly distributed.  
  6. Bake for 18-22 minutes, until lightly golden.
Caramel:
  1. While the shortbread cookies, in a heavy bottomed saucepan over medium heat, combine the butter, brown sugar, sweetened condensed milk, corn syrup and salt. Bring to a boil, stirring constantly. Heat to between 242 and 245 degrees F.  Cook for 2 minutes at that temperature. Remove from the heat and stir in vanilla.    
Assembly:
  1.  Once the shortbread is out of the oven and has cooled slightly, evenly distribute the pecan pieces over the entire shortbread.
  2. Once the caramel is done, poor it evenly over the pecans/shortbread, making sure all of it is covered.
  3. Sprinkle the chocolate chips over the entire caramel surface and allow to sit until they all turn shiny, which means they have melted.  Once they have melted, use a knife or offset spatula and evenly coat all the caramel with the chocolate until none of the caramel can be seen.
  4. Allow to cool on the counter for several hours, sprinkle lightly with coarse sea salt,and then place in the fridge for 30-45 minutes, just until the chocolate hardens.
  5. Remove from fridge, lift out using the parchment paper and place on a flat surface.  Using a large, sharp knife, cut in to approximately 72 pieces (6 rows by 12 rows).
  6. Enjoy or put in fridge to continue to set up.  Store in refrigerator.    

Monday, September 10, 2012

Our Little Guy's First Birthday Party

Pin It Now!
The dessert spread...strawberry with homemade pound cake, funfettie and devils food cupcakes with butter cream frosting, no bake nutella oreo cheesecakes, gluten/dairy free brownies, two kinds of macarons, monster cookie dough truffles, and on the very left, pie crust fries. 
  Well, the day finally came.  Our youngest son's 1st birthday party!  I went ALL out for our older son's thrid birthday party, which you can see here.  That was only a month ago, and I was still exhausted from that one, so I decided to scale back and just do a dessert party.  If you haven't figured it out already, I love making desserts.  I had a list a mile long of ideas.  What you see in these pictures has been pared down from a much longer list than what it started, and things I had every intention of making got cut from the menu even up to that day, once I started putting out the food, seemed like it would be too much.  I was right.  Just for kicks, I was going to have caramel popcorn, then downgraded that to buttered popcorn, then dropped it all together.  I was also going to do chocolate and caramel dipped hard pretzels, those didn't make the cut either.  It was good though, there was a ton as it was.

The first thing I need to do is give a huge thanks to Larry Berger Photography for the incredible photos taken at the party, I am so thankful to have a photographer as a father! (As are his non photo-shy grand kids).

Secondly, I am not in any way creative, and all the cute signs and printables were the Little Peanut the Elephant Customized Printables package from.  Fantastic product, wonderful customer service, and they have hundreds of party package designs. I couldn't find the shop on Etsy at the moment, but the link goes to their blog.

These cute little swirly suckers I got from the Oriental Trading Company, and added some of the printable labels from the Dimpleprints pack.  Absolutely perfect for the theme.

Labels from Dimpleprints, lollypops from Oriental Trading Company
As with any party, the food is the biggest attraction, second to our birthday boy.  Below are some of the most insanely delicious and uber chocolatey fudgy brownies I have ever had.  Not only that, but they were gluten and dairy free!  We had several family members with dietary restrictions, and I think I can happily say, that with these, they did not feel like they were missing out on anything, because they were insanely delicious!  I will be doing a recipe post on these later, but the recipe was from Katrina over at Gluten Free Godess.  I will never make regular brownies again.


The lovely green and orange gems pictured below are my Andes mints macarons (green) and my boysenberry jam filled macarons (orange).  The orange ones also worked great for those on a gluten or dairy restrictive diet. 


These are my go to favorite for those that don't have much of a sweet tooth, like my husband.  Of course, I covered half of them in cinnamon sugar, but these are homemade soft buttered pretzels with either salt or cinnamon sugar topping. Went great with the circus theme too!

In the back of the picture you can see a container on the left with little wrapped candies, those are my peppermint salt water taffy's I made as well.


Here is a drool worthy close up of the cinnamon sugar pretzels...I won't lie, was I pretty proud of how they came out.


 Here we have a dessert for the non chocolate lovers--homemade pound cake (King Arthur Flour inspired)    with fresh strawberries and whipped cream.  I think it is one of my new favorite desserts.  Simple, light, refreshing, and just yummy.


I love nutella, I had to have a nutella dessert, and in fact, I had several.  I worked very hard though to whittle it down to one.  I decided on this no bake nutella oreo cheesecake cup.  It was slightly adapted from My Baking Addiction's  No Bake Nutella Cheesecake recipe. If you like nutella, or cheesecake, or oreos...this is your dessert!  My husband isn't a big fan of any of those things, and he was just loving these to pieces!


I adore King Arthur Flour's website, blog, recipes, and products.  I follow them on Facebook and was fortunate enough to see a post a few weeks ago about Pie Crust Fries.  I saw that and I immediately put those on my list of things to make for the party.  I mean really, how cute is this??  Covered in cinnamon and sugar, put in fry containers I got on the Oriental Trading Company's site, and with labels from Dimpleprints. 

We had so much (even after cutting back and not making everything), that I got to send everyone home with to-go containers (yes, I have a pack of take out containers from Sam's just for this reason) full of goodies.  I love being able to share the foodie love.  And...I do not need to be left alone with all these goodies!  That would be so bad for the diet....


Now, on the the highlight of the party.  Our photo booth!  I was good, I didn't plan any silly games, or much of anything at all, but the one thing I had to have was a "photo booth."  I decorated an area in our house, bought some silly mustache props and some clown noses, and made (yes, you can ask, I made them do it) everyone take a turn taking some funny pictures.  I am so glad that I did, because they are absolutely priceless!!!  I am going to be polite and only post pictures of us, but let me tell you, every photo of every guest was just fantastic and priceless!


This is my wonderful husband, and our rambunctious but darling three year old.  He wears that clown nose and funny glasses with just a little too much ease :)


**Note--After discussions with my husband as to whether or not our kids should be pictured on the blog, we decided we would, but I have removed any personal information from the pictures for safety reasons, so if there is an area in a picture that looks a bit funny, it is because of my poor photo shopping job, and in no way the photographer's doing.**

This would be me and my hunny doing our photo booth photo.  Can't make everyone else do it if I refused to, right?  I am a good sport like that.  The background for the photo both is just tablecloths cut lengthwise and strung from our chandelier to the wall.  The banner is another great printable from the party pack from Dimpleprints.


Must have one of the whole family!  The birthday boy was more interested in eating the mustache than wearing it, but what do you expect? 


Since we did a photo shoot last week for the birthday boy, in which I made a two layer cake with butter cream frosting for him to destroy in his pictures, I decided to cheap out on it for the party.  I just took a cupcake and covered it in whipped cream.  I figured it would be an easier mess to clean up.  I think he knew that he got cheated, he wasn't very in to making any mess.  Good for me, bad for the photo ops.  Thank goodness for that photo shoot the week before!  Mess or not, he was still a very happy little guy with his cupcake.


The hardest part of the party was trying to convey to our three year old that these presents are not for him, that he can not "help" his brother by opening them all for him, and that the gifts inside are not his, but his brother's.  This is him do his "sad walk."  In other words, he was MAJORLY pouting.  His brother was not particularly concerned about it it seems.  More interested in the hangers.  We are still trying to convince the elder one that these new toys are his brothers and not his...not going well.


Well that was pretty much the party.  Eating, pictures, birthday cake for the birthday boy, and presents.  Short(ish), sweet, and simple (kinda).  I had a blast planning it, loved all the different desserts I got to make, and enjoyed getting to share the big milestone of the youngest having his first birthday with all of our family that came. 

Wednesday, July 25, 2012

Food Review: Merely Sweets--Brea, CA

Pin It Now! On the recommendation of my brother, my family and I went down to Merely Sweets Bakery in Brea, CA since we were right down the sidewalk at Farell's Ice Cream Parlor.

Picture from Kat's 9 Lives blog


When you walk in, it is a very clean, contemporary, somewhat stark design that really allows the desserts to shine.  They were displayed very nicely, with a few cakes, several kinds of cupcakes, a few cookies, and a beautiful display of macarons. They had much less out than I thought they would for a bakery, but I don't know if that is because it was a late sunday afternoon and they were running out, or they just only have a few items.

I am a die hard nutella fan, so when my husband saw they had a nutella cupcake, he pretty much had that ordered right off the bat...he knows me well :)  My brother was going on about macarons earlier that day, even lent me a book on making them, so I had to try one to see what it was all about.  I got the salted caramel macaron.  In the picture below from Kat's 9 Lives, you can see what the salted caramel macaron looks like, it is the one on the bottom left.  It was wrapped up in a nice little bag all by itself, very cute.

The nutella cupcake was wrapped in an individual box and they were both put it another bag.  The prices are a bit high, but for artisinal sweets, I guess it is expected.  Here is the nutella cupcake, photo also from Kat's 9 lives. 


I lovingly protected my stash all the way home.  This is what it looked like when it went in the box, but when I got home and opened it, even though it hadn't tipped over in the box or anything, the frosting had split and completely slid off.  That was disappointing.  I decided to blow all my remaining calories for the day, and indulge in my treats since I didn't know how they would keep.  I started with the macaron.  First off, I LOVE caramel.  The first bite was heavenly!!  It was salty, sweet, and very caramely.  I was so sad I only had one.  The shell was crisp on the outside, slightly chewy on the inside, and I was hooked on macarons right then and there.

With the bar set so high, I was looking forward to the cupcake, even if the frosting did slide off.  I unceremoniously put it back on, grabbed a fork, and dug in.  This is where my happiness ends.  Having eating many, many, many containers of nutella, I know what it tastes like.  I can honestly say that I could not discern a lick of nutella taste from the cupcake or the frosting.  The cake was kind of dense, not a very fine crumb, and not as chocolaty as I would have imagined.  The frosting is where the worst offense was though.  It was like a mouth full of grainy, sugary, shortening laden paste.  It had no chocolate flavor, absolutely no nutella flavor, and it was not flavored of anything really other than sugar and butter or shortening (not normally a bad thing, if there is some other flavor to go with it).  It was so unpleasant, I was so bummed.  I ate it only because I spent almost 3 bucks on it.  Wasn't going to waste the money.

I really expected more from a bakery that looked as nice as this.  The presentation on everything was beautiful.  The macarons where to die for.  The nutella cupcake though, such a disappointment.  It is very possible that it is just my opinion and expectations for frosting, but when you say nutella, in my opinion (and this is all this is), it should taste like nutella, not a mouth full of sugar with no other discernible flavor. 

I would definitely go back for the caramel macarons, but I won't be buying any cupcakes any time soon.

Merely Sweets on Urbanspoon

Saturday, July 21, 2012

Curious Liam's 3rd Birthday Party

Pin It Now!
Today was the day!  The day my weeks and weeks of research (Ok...hours of research on Pinterest...I confess!), supplies collecting, baking, and crafting finally paid off.  Today was my son's 3rd birthday party!  We decided to go with a Curious George theme for several reasons.  One, my son acts more like a monkey than a toddler.  Two, he watches the Curious George shows ALL the time.  I have seen every one.  MANY times.  And there are probably 100 episodes.  At least.

Thanks to the help of my sisters, my mom and dad, my husband, and my mother-in-law, plus several borrowed items from other family members, we were able to pull off a reasonably successful birthday party I believe.

 Here are goody bags we did for the kids.  They had Curious George gummy snacks, glow stick bracelets, crayons, and a Go-Go applesauce squeezer.  Kind of random, but they were affordable, useable, and not completely comprised of junk food (though that is never a bad kind of gift bag).  We wrote the names of the kids on them before they left.
 Here is our "picture wall."  My dad is a professional photographer, so I tried to give him a decorated spot in which to take pictures of the guest with the birthday boy.  I love pictures (can you tell?  There are one or two here).
 My incredibly talented sister painted Curious George.  He was life size, and a dead ringer for the cartoon George.  My son was just enamored and amused and thrilled to have George at his party, and he made for cute pictures!!
 Got to have a close up.  My son has always kind of lived a monkey themed life.  We will never theme our kids room etc. after monkeys again though.  We had his nursery done in monkey theme, and all the stuff we got him  before he was born was monkey themed, and we ended up getting a baby/infant/toddler that sometimes acts more monkey than kid.  The next baby we had, his theme: Winnie the Pooh.  A nice, relaxed, laid back character :)
 Cupcake toppers!  All the printed designed items were from Photo designz  on Etsy.  Great great value, and the printables were fantastic!
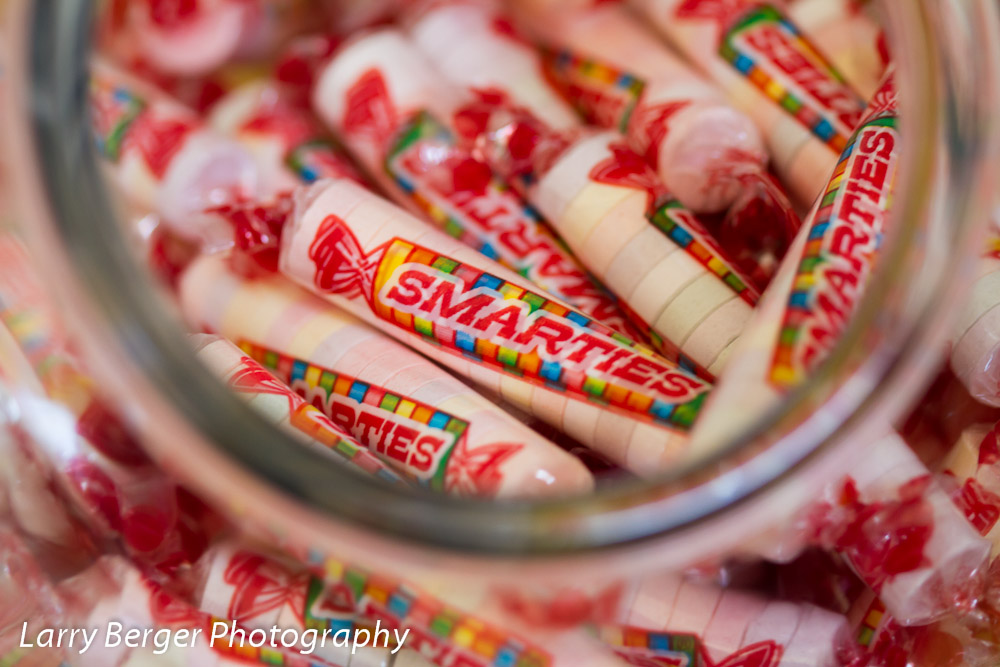
 His favorite candy...these and Starbursts.
 This banner was a pain.  It went so much better in my head than it did in real life.  That said and done, after many re-doings of tape and string, we got it up, and I absolutely loved it.  The whole thing said "Happy 3rd Birthday"
 Happy!
 This is a family staple at parties.  It is our version of 7-layer dip, affectionately dubbed "Dave's dip" for the uncle that brought the recipe home from home economics class one day.  Today, it was Jungle dip!  (Those are olives on top...just sayin'.  I thought I bought sliced...oh well.)  We did these individual servings and had individual brown paper bags of chips to go with them.  Portable, individual, and tasty!  Bring on the double dipping to your hearts content!
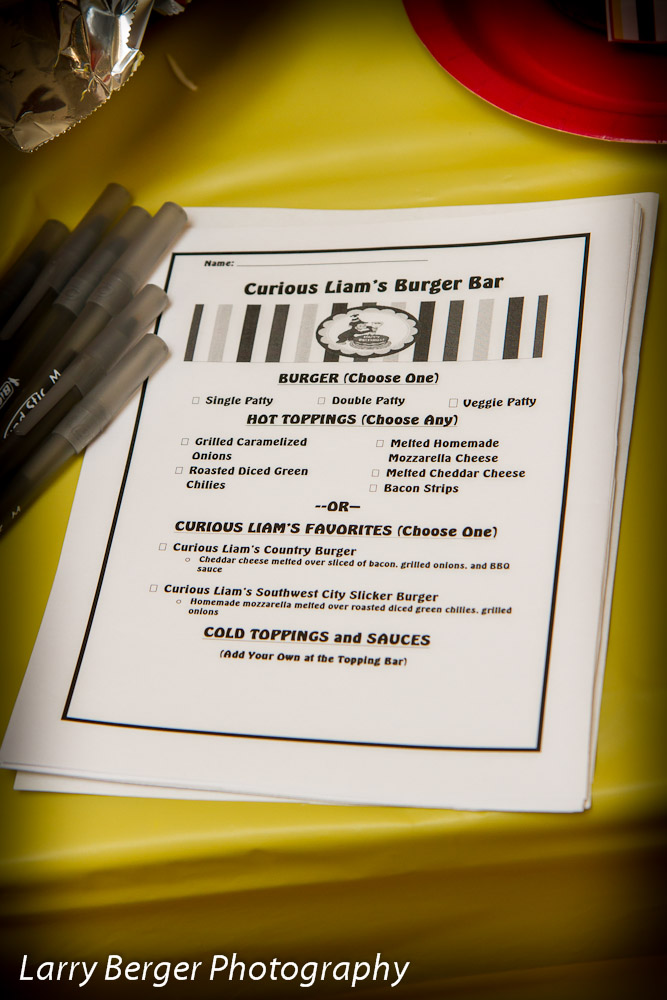
 We served burgers for lunch.  This is a shot of the menu that I made for people to order their burgers.  They got to choose from a single or double patty (or veggie), their choice of hot toppings (bacon, green chilies, caramelized onions), and cheese (homemade mozzarella, cheddar cheese).  We also made up two "Curious Liam Specials."  The guests marked down the toppings they wanted, and we cooked to order.  Then they got to help themselves to the cold toppings bar we had out also.  Homemade hamburger buns, homemade BBQ sauce, homemade mozzarella cheese (yes, homemade.  There is a previous blog post on it if you don't believe me), caramelized grilled onions, roasted diced green chilies, maple bacon, cheddar cheese, and all the regular burger fixin's as well.  These made for some tasty burgers if I do say so myself. Sorry there isn't a picture...no waited long enough to eat their burger for a picture.  My husband the grill master slaved away (and I mean SLAVED away) at the BBQ for a long time in 95+ degree heat (not including the 450 degree heat of the BBQ) cooking all the onions, peppers, burgers, and bacon.  He was such a trooper and it wouldn't have been the awesomeness without his grilling expertise. 
 Homemade dill pickles. 
 This was fruit salad in little waffle cone bowls.  So good, so easy, and so fun!
 On to the desserts...I love desserts by the way.  This is the cupcake spread.  We had vanilla with meringue frosting, and devils food cupcakes with meringue frosting.  The cupcake toppers were part of the printables package from Print Designz, as well as the buffet labels.
 Close up!

 I made caramel apples with chocolate and white chocolate drizzle for party favors for the adults.  Homemade caramel for them of course.  This was one of my favorite parts of the whole party spread, I was so happy with them.
 I was lucky enough to find monkey cupcake liners.  Who knew, right?
 For a monkey party, you must have banana something.  My banana something--frozen chocolate dipped bananas.  Some were plain, some were rolled in peanuts, and some were rolled in Reese's peanut butter cup morsels.
 The whole dessert spread table. 
The last dessert we had was vanilla milkshakes.  I made homemade chocolate sauce, and homemade caramel sauce (Oh my gosh...I wish I could have an I.V. of that caramel sauce...) for people to drizzle in if they wanted to flavor it.  These were a big hit and were gone as soon as I turned my back.  It was funny.

I tried to get the best deal on everything, and spend the least amount I had to while getting what I really wanted.  This involved many trips to Walmart (the shake cups, trays, candy jars, ribbon, and colored table cloths all Walmart, and under a dollar each), Target (napkins, dessert and appetizer plates), Sam's (squeeze bottles, cups for the dip, red dinner plates), and more stores too.  It was so nice to have a themed party, but not have it looked like Party City threw up in my house.  My goal was to not have it look like that happened, and I am happy with the outcome.

We also had a Curious George bounce house from www.jumpforfun.com out in our backyard.  This was the best money spent on the whole day!  Our son was over the moon!  He bounced and bounced and just had a blast.  I highly recommend splurging on one if you have an energetic child like we do.  It just made him so happy. 

A gigantic thank you to Larry Berger Photography, who took all these dazzling and drool worthy pictures.  A picture is worth a thousand words, and these all say "Yummy yummy yummy!!"

Overall, it was a lot of work, a lot of research, a lot of driving to a million different stores to get the best deal (I bargain searched, I really tried to do this as inexpensive as possible), and a lot of man hours.  In the end, it was SOOO worth it.  I think our son had a great time, he enjoyed the bouncer, the presents, the blowing out of birthday candles, and probably all the attention in general.  Heck, for a 3 year old, I guess you can't expect much more :)

Happy Birthday Curious Liam!  


Related Posts Plugin for WordPress, Blogger...