Showing posts with label chocolate. Show all posts

Monday, November 19, 2012

Salted Caramel Pecan Shortbread Bars

Pin It Now!

I don't really have any profound comments for this recipe, other than I just really wanted to combine pecans, caramel, shortbread and chocolate into something  delicious.  They were delicious!


I owe my mom and dad a big thank you though, because they got me a food photography "How-To" book, that I immediately read upon receiving.  I had to make something today so that I could try out all the tips, so that was really motivating my baking today.  Sadly, by the time I was done baking, I had lost almost all the daylight, but I worked with what I had, I will have more chances to practice.  It was so fun to implement what I learned, and hopefully my photos will continue to improve.

Salted Caramel Pecan Shortbread Bars

Ingredients:


Shortbread:
(Adapted from The Joy of Baking's Shortbread Cookies)
  • 1 cup (2 sticks) butter, softened
  • 1/4 cup powdered sugar
  • 1/2 cup brown sugar, packed
  • 1-1/2 teaspoon vanilla extract
  • 1-1/2 cups all purpose flour
  • 1/2 cup corn starch
  • 1/4 teaspoon salt
Caramel:
(Adapted from Chewy Caramel from All Recipes)


  • 1 cup butter
  • 1 pound light brown sugar
  • 1 (14 ounce) can sweetened condensed milk
  • 1 cup light corn syrup
  • 1 pinch salt
  • 1 1/2 teaspoons vanilla extract
Other:
  • 8 ounces roasted and salted pecan halves, broken up
  • 12 ounces semi-sweet chocolate chips
  •  course sea salt
Directions:

Shortbread:

  1. Line a 9x13 in. baking dish with parchment paper.  Make sure it extends up all four sides.  Preheat oven to 350 degrees F. 
  2. In a medium bowl  cream butter until smooth and creamy.  Add sugars and cream together for another minute, until smooth.  
  3. Add the vanilla and beat until incorporated well.
  4. Add the flour, corn starch, and salt and mix until just combined.
  5. Using your hands or a spatula, press the dough into the prepared pan until it is evenly distributed.  
  6. Bake for 18-22 minutes, until lightly golden.
Caramel:
  1. While the shortbread cookies, in a heavy bottomed saucepan over medium heat, combine the butter, brown sugar, sweetened condensed milk, corn syrup and salt. Bring to a boil, stirring constantly. Heat to between 242 and 245 degrees F.  Cook for 2 minutes at that temperature. Remove from the heat and stir in vanilla.    
Assembly:
  1.  Once the shortbread is out of the oven and has cooled slightly, evenly distribute the pecan pieces over the entire shortbread.
  2. Once the caramel is done, poor it evenly over the pecans/shortbread, making sure all of it is covered.
  3. Sprinkle the chocolate chips over the entire caramel surface and allow to sit until they all turn shiny, which means they have melted.  Once they have melted, use a knife or offset spatula and evenly coat all the caramel with the chocolate until none of the caramel can be seen.
  4. Allow to cool on the counter for several hours, sprinkle lightly with coarse sea salt,and then place in the fridge for 30-45 minutes, just until the chocolate hardens.
  5. Remove from fridge, lift out using the parchment paper and place on a flat surface.  Using a large, sharp knife, cut in to approximately 72 pieces (6 rows by 12 rows).
  6. Enjoy or put in fridge to continue to set up.  Store in refrigerator.    

Friday, November 9, 2012

No Bake Nutella Oreo Cheesecake Cups

Pin It Now!

For my son's first birthday party we decided to just do a dessert bar.  One of the desserts that made the cut were these killer Nutella Oreo Cheesecake cups that I saw on My Baking Addiction.  Because we had like 12 different desserts, I made them pretty small, as you can see in the picture, but it was perfect for getting to try everything.  If you are doing it for a dessert spread, then you could get about 12 small servings out of this.  If you are like me and don't want anything more than to dive into a pool of this filling, then make 6 larger cups :)  This even converted my non-sweets lovin' husband to nutella, he was sold!

I really can't say much more about the amazingness of these other than go.  Just go.  Go and make them right now, you won't be sorry!  They were by far the favorite dessert provided at the party, so much so, that I was requested to make them for another family member's surprise party.  They were a hit there too.

NO BAKE NUTELLA OREO CHEESECAKE CUPS
(Adapted from My Baking Addiction's No Bake Nutella Cheesecakes)

Makes 12 small cups (for like a dessert sampler) or 6 larger ones

Ingredients:
  • 24 oreo cookies
  • 8 ounces cream cheese, softened 
  • 8 ounces frozen whipped topping, thawed
  • 1 teaspoon vanilla extract
  • 3/4 cup nutella spread
Topping:
  • 4-5 crushed oreos for sprinkling (optional)
  • whipped cream (optional)
  • shaved chocolate (optional)
Directions:
  1.  Crush the 24 oreo cookies in a ziploc bag or in a food processor until coarse ground.  Evenly distribute cookie crumbs between the cups.
  2. In a medium bowl, use a hand mixer to beat the cream cheese, nutella, and vanilla together until lightened, smooth, and fluffier.  
  3. Using a spatula, carefully fold in the whipped topping into the nutella and cream cheese mixture until it is well combined and there are no more streaks.
  4. Pipe or spoon the filling into the prepared cups on top of the oreo crumbs., dividing evenly.  
  5. Right before serving, top with whipped cream, oreo crumbs, and chocolate shavings.  Serve cold.

Thursday, October 25, 2012

Fudgy Peanut Butter Chip Cookies

Pin It Now!

Ok. For WEEKS I have been craving something just utterly chocolatey, sweet, savory, chewy and yummy.  I have looked through hundreds of recipes and could not decide.  Do I make brownies?  Cookies?  Candy?  Well, I decided!  I found a recipe for Flourless Fudge Cookies on King Arthur Flour.  I have made them before with regular chocolate chips, and they are like fudgy brownies in cookie form.  Absolutely the richest chocolate cookie I have ever had.  I thought that this time, to get some of that savory in there, I would add some Reese's peanut butter morsels.  OH. MY. GOSH!  These are like a killer peanut butter cup cookie.  I won't lie, these are dangerous.  What is even more dangerous about them, they take about 5 minutes to whip up, if that, and 8 minutes to cook.  in 13 minutes you can be in peanut butter chocolate bliss.  AND they are waist line friendly, at only about 80 calories a cookie. 

This is by far one of my favorite cookie recipes of all times.  My son even helped me make these tonight, perfect cookie for little ones, since it doesn't require a long attention span from start to finish.

FUDGY PEANUT BUTTER CHIP COOKIES
(Adapted from King Arthur Flour's Flourless Fudge Cookies)

Makes approximately 36 cookies

Ingredients:
  • 2 1/4 cups confectioners' sugar
  • 1/4 teaspoon salt
  • 3/4 teaspoon instant coffee granules, optional but tasty
  • 1 cup cocoa powder, Dutch-process
  • 3 large egg whites
  • 2 teaspoons vanilla extract
  • 1 package (10 oz.) Reese's peanut butter morsels
 Directions:
  1. Pre-heat oven to 350 degrees F.  Lightly grease two baking sheets, or line them with parchment paper and lightly grease the parchment.
  2. Using a hand mixer, mix everything together except the peanut butter morsels.  Scrape down the bottom and sides and mix again.  Add the peanut butter morsels and mix in gently.
  3. Using a 2 teaspoon cookie scoop, scoop out dough (more like a batter) onto the prepared cookie sheets.  Flatten the cookies out slightly to even distribute the morsels.
  4. Bake in oven for 8-9 minutes, until they spread, are slightly shiny, and start to crackle a little bit on top.  They should be slightly firm to the touch.
  5. Let cool on cookie sheet. 


Sunday, October 21, 2012

Sunday's Sweet Confessions Link Party #12 with a side of Wake Up Chocolate Chip Coffee Cake!

Pin It Now!
Sweet Confessions Sunday Link Party #12

Welcome everyone to this weeks link party!  This week I have the featured links in their very own post that you can check out here.  Make to to check out the fabulous posts!  In place of the featured links I am bringing you all a scrumptious breakfast recipe (even if it is dinner time where you are, who doesn't want coffee cake for dinner?): Wake up Chocolate Chip Coffee Cake.  Yep, coffee cake with actual coffee.  And what the heck, some chocolate for good measure!  What a great way to wake up, or stay awake.  Most, chocolatey, with a hint of coffee goodness.  A guaranteed pick me up!


Wake Up Chocolate Chip Coffee Cake
(Adapted from Sweet Pea's Kitchen's Coffee Lover's Chocolate Chip Coffee Cake)
 Ingredients:
Topping and Filling:
  •  1/3 cup brown sugar
  •  4 ½ teaspoons instant coffee granules
  •  1 ½ teaspoons ground cinnamon
Cake:
  • 1 ½ cups all-purpose flour
  • 1 teaspoon baking powder
  • 1/2 teaspoon baking soda
  • 1/8 teaspoon salt
  • 3 tablespoons butter, softened
  • 1/2 cup sugar
  • 1 large egg
  • 1 teaspoon vanilla extract
  • 1 cup fat free plain Greek yogurt
  • 1 cup semi-sweet chocolate chips       
 Directions:
  1. Preheat the oven to 350°. Grease an 8-inch square baking pan and set aside.
  2. Filling/Topping: In a small bowl combine the brown sugar, coffee granules and cinnamon; set aside.   
  3. Coffee Cake: In a medium bowl, whisk together the flour, baking powder, baking soda and salt; set aside.
  4. In a medium bowl, using a hand mixer, beat butter and sugar until crumbly, about 2 minutes. Beat in egg and vanilla until combined. Gradually add the flour mixture alternately with Greek yogurt, beginning and ending with flour mixture. (The batter will be thick)
  5. Spread half of the batter evenly into prepared baking pan (I sprayed my finger tips with non-stick spray and pressed it out, it was easier) and sprinkle with half the cinnamon-sugar topping and half the chocolate chips. Spoon the remaining batter in 8 dollops over the batter in the pan and spread gently. Sprinkle with the remaining cinnamon-sugar and chocolate chips.
  6. Bake 25-30 minutes or until a toothpick inserted in the center comes out clean. (I used a glass pan and it took closer to 37 minutes, so just keep checking, it will depend on your pan and your oven).
      

Sunday, October 7, 2012

Heavenly Cookie Bars

Pin It Now!

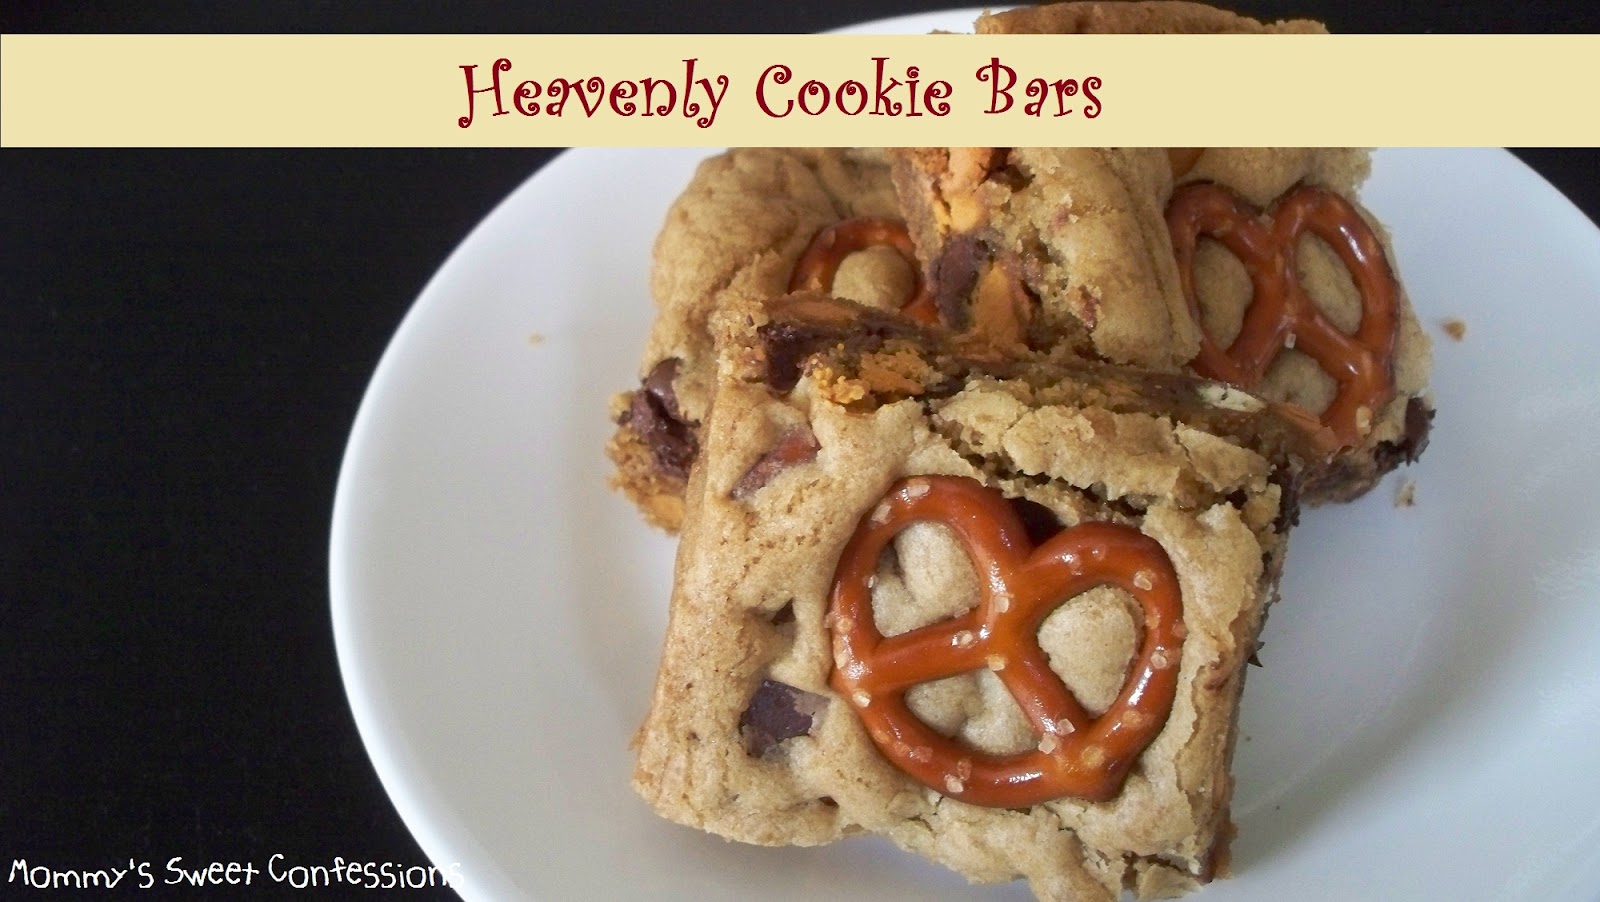
I have been dying for some sweet, salty, chewy, and very chocolatey cookies lately, but have frankly been too lazy, and too busy (bad combo) to do anything about it.  One of my favorite bloggers, Sweet Pea's Kitchen, happen to post a  recipe for Thick and Chewy Chocolate Chip Cookie Bars.  It was exactly what I was looking for.  All the yummy of cookies, without slaving over an oven repeatedly putting in and taking out sheets of cookies.  It mixes up quick, didn't even need a mixer, just a whisk (BIG bonus!!) and bakes up in no time.  The only modification I made was that instead of all chocolate chips, I added chocolate chips, butterscotch chips, and then pretzel pieces, and then some whole pretzels on top just for presentation points. 

They truly are heavenly.  Sweet, salty, chocolaty, crunchy, chewy, seriously, just heavenly.


Heavenly Cookie Bars
(Adapted slightly from Sweet Pea's Kitchen's Thick and Chewy Chocolate Chip Cookie Bars)

Makes 1- 9x13 pan, cut into 24 or 32 slices

Ingredients:

2 ⅛ cups all-purpose flour (10 1/2 ounces)
1/2 teaspoon table salt
1/2 teaspoon baking soda
12 tablespoons unsalted butter (1 1/2 sticks), melted and cooled slightly
1 cup light brown sugar (7 ounces)
1/2 cup granulated sugar (3 1/2 ounces)
1 large egg
1 large egg yolk
2 teaspoons vanilla extract
1 cups semi sweet chocolate chips
1 cup butterscotch chips
3 oz. mini pretzels, half broken into small pieces, half kept whole for the top

Directions:
  1. Pre-heat oven to 325 degrees F.  Line a 9x13 inch baking pan with parchment paper, with ends extending up the sides (will be for easy removal later).
  2. In a medium bowl whisk together flour, salt, and baking soda and set aside.
  3. In a large bowl, mix together with a whisk, the melted butter, brown sugar and white sugar until combined.
  4. Add egg, egg yolk, and vanilla and mix well.
  5. Using a spoon or spatula, mix in dry ingredients into the egg and butter mixture until just combined.
  6. Mix in the chocolate chips, butterscotch chips, and broken pretzel pieces and mix well.
  7. Scoop into the prepared pan, using a spatula to press it down evenly into the pan.  Place the whole pretzels on top in a decorative pattern (I used 24 evenly spaced ones, so when they are cut, there would be 24 servings, each with a pretzel on top) and press down slightly.
  8. Bake for 27-32 minutes, until the top is light brown, slightly firm to the touch and the edges start to pull away from the sides.
  9. Remove from oven and let cool on a wire rack to room temperature.  Using the parchment paper, lift the bars out, cut into 2-inch squares and serve.

Tuesday, September 11, 2012

Mind Blowing Brownies (GF and DF)

Pin It Now!

For my son's 1st birthday I made a bunch of desserts for the party (it was a dessert only party).  A few of my family members have dietary restrictions including a dairy and gluten free diet.  I asked them what sounded good and I was met with a confident "brownies!" reply.  I had made gluten and dairy free brownies from Gluten Free Goddess once before, and when I went back to make them again, the recipe had been updated.  It was the day before the party, I only had enough ingredients to make it once, but since Karina's recipes have yet to fail me, I committed 100%. 

I love rich, fudgy brownies.  I was concerned that these would taste like they were a gluten free version of a brownies.  OH. MY. GOSH.  I was so proved wrong!  They came out and my house smelled like heaven (at least what heaven would smell like for me if I could choose).  These are the most incredible, rich, fudgy, yet just enough cakey to be not outright fudge.  I have never had a brownie this good, and I will never make a gluten laden box recipe again.  This is now my go to brownie recipe.  If you like chocolate, you have to make these. I added some instant coffee granules to enhance the chocolate flavor, but otherwise did it as written from Gluten Free Goddess.

I can not stress how much you need to make these.  Seriously, go.  Make them.  Karina has brilliant recipes over there for gluten and dairy free needs.  Absolutely brilliant!  Someday maybe I will mess around with the recipe and make some changes, but I really don't want to mess with perfection right now.

I will warn you though, they are not health food.  At all.  Not even close.  Don't eat the whole pan unless that is all you are going to eat for the day.  Don't say I didn't warn you.  But truly, these will blow your mind to pieces.

*Note-If you are baking these for someone with gluten or dairy intolerance or allergies, please do your homework and make sure the ingredients you use are in fact gluten and/or dairy free.

MIND BLOWING CHOCOLATE BROWNIES (GF and DF)
(Ever so slightly adapted from Gluten Free Goddess' Dark Chocolate Brownies)

Makes 16 servings

Ingredients:
  • 5 oz. dark or semi-sweet chocolate (I used Trader Joe's semi-sweet chocolate chips, they are gluten and dairy free)
  • 1/2 cup organic coconut oil (I used Sprout's organic refined coconut oil)
  • 1 cup brown sugar, not packed
  • 1/2 cup almond meal (Trader Joe's)
  • 1/4 cup brown rice flour (Bob's Red Mill)
  • 1/2 tsp. sea salt
  • 1/4 tsp baking soda
  • 2 eggs, lightly beaten
  • 1 Tbs. vanilla extract
  • 1/4 to 1/2 tsp instant coffee granuals or espresso powder (optional, but enhances chocolate flavor) 
  • 1/2 cup chopped pecans or walnuts (optional, I omitted)
  • 1-2 ounces chocolate chips for the top (optional, but looks so nice, and tastes so good!)
Directions:

  1. Preheat oven to 350 degrees F.  Line an 8x8 inch baking dish parchment paper or aluminum foil (oiled).
  2. In a microwave safe dish, melt the chocolate, coffee granules (optional), and the coconut oil in 30 second increments, stirring in between, until well combined.
  3. In a medium bowl mix the brown sugar, almond meal, brown rice flour, salt, and baking soda together.
  4. Add the eggs and vanilla and mix on low speed to combine, then drizzle in the chocolate mixture.  Mix on medium speed for two minutes, making sure everything is well incorporated.  The batter will thicken as it is beaten and will become smooth and shiny.
  5. If you are adding nuts, mix them in now, and then spread the batter out into the prepared pan.  Sprinkle the top with chocolate chips if desired.
  6. Bake in the preheated oven for 30-35 minutes, or until they are set, and a toothpick inserted in the center comes out clean with maybe a few moist crumbs.  The top cracks like a flourless cake, so don't fret when that happens.
  7. Cool on a wireless rack.  Chill in the fridge for 1-2 hours before cutting if you want to have them cut nicely.  They can be eaten warm if you don't want to wait and don't mind them not holding together real well.  They will taste just as good.
  8. I made these the day before my event, let them cool on the counter, stored them in the fridge over night, pulled them out 30 minutes before serving.  They cut beautifully! Taste amazing.  I stored the leftovers (the few there were) in the freezer, they taste great right out of the freezer too.

Monday, September 3, 2012

Monster Cookie Dough Truffles

Pin It Now!

Big confession: I am a closeted (or maybe not so much if you know me) germaphobe.  Sending my toddler to preschool, when I had worked so hard to keep him healthy for the first 2 1/2 years of his life, almost sent me into major panic and anxiety attacks.  It felt like I was essentially putting him in a situation where he was going to get sick, for sure, all the time.  I won't say I was wrong, but it could have been worse I am sure.  I also dislike working with raw meats, hand sanitizer probably pulses through my veins (as well as my children's), and I wash my hands so many times when cooking and baking I could pass FDA inspection.

Given all this, I am sure you can guess that I would not be one eat raw cookie dough, in fact, I can't even watch someone else do it.  Then, I saw the most wonderful thing...EGG-LESS cookie dough dips and truffles!  The heavens opened up and sang.  All though I can't usually justify making cookie dough to just eat, this week is my youngest son's birthday party and I need another dessert (Ok, maybe I don't NEED another dessert for it, but really, you can never have too many).  Perfect time to make some monster cookie dough truffles ( I LOOOOVE monster cookies!).

MONSTER COOKIE DOUGH TRUFFLES

Makes approximately 50 truffles

Ingredients:
  • 1/2 cup (1 stick) salted butter, softened slightly
  • 8 oz. peanut butter (I used Skippy Naturals)
  • 1/3 cup brown sugar, packed
  • 1 1/2 cups powdered sugar
  • 1 tsp vanilla
  • 1 1/2 cups old fashioned oats
  • 6 oz. semi-sweet chocolate chips
  • 3 oz M&M candies
  • 12 to 16 oz semi-sweet or milk chocolate chips
Directions:
  1. In a medium bowl, using a hand mixer or stand mixer, cream together peanut butter and butter until it is smooth and lightens in color slightly.
  2. Add in brown sugar, powdered sugar, and vanilla and mix until smooth.
  3. Add oats and mix well to combine.
  4. Place M&M's in a small bag and use a rolling pin or heavy pan to break them into smaller pieces.  Add this and the 6 oz. of semi-sweet chocolate chips to the the dough and mix well.
  5. Using a 2 tsp. cookie dough scoop, scoop out truffle centers onto a parchment or foil lined cookie sheet.
  6. Roll the centers in your hands to make smooth balls.
  7. Place in freezer for 1 hour to chill and firm up.
  8. Melt the 12 to 16 oz. of semi-sweet chocolate chips in the microwave in 30 second intervals, stirring in between until melted and smooth.
  9. Using a fork, roll the chilled truffle centers in the melted chocolate.  Remove using a fork or a tooth pick and return to lined cookie sheet.  
  10. Chill in fridge until the chocolate has set, or store in freezer.

Monday, August 27, 2012

Party Caramel Apples: Recipe and How to

Pin It Now!

First, A Story of Failure (Learn from My Mistakes)

For my son's 3rd birthday party I had it in my head that I had to make caramel apples.  Had to be homemade, had to have chocolate, and I had to make them for the party.  No negotiating, I just had to make them.  In preparation for making them, I tried a few caramel recipes.  The first recipe I tried  smelled good, went on the apples well enough, but when it hardened, it turned into a grainy disaster, that crumbled when you bit, pulled, or chewed it, instead of being that wonderful chewy caramelly goodness.

They look ok, the ones that the caramel actually stayed on, but they had an awful texture.
 I wasn't sure what I had done wrong.  I didn't have corn syrup when I made this batch (one of the main ingredients), so in my infinite wisdom I looked it up on the internet how to substitute it, and the site I looked at said just add x amount of sugar and y amount of water in place of the corn syrup called for, and it will be all good.  Upon further reflection, and research, after this bombed batch, I found out that the site left out something important about subbing that for corn syrup:  the very important part about boiling those to things to a softball stage and THEN adding it to the other ingredients in place of corn syrup.  Anyways, two lessons learned: 1) don't believe every substitution you see on the internet. 2)  Just go out and by an ingredient if it is going to be that crucial to success.  When making candy, I have decided that there are some substitutions that can't be made, it is too much chemistry dependent.


On to the Party Caramel Apple Success and Recipe

Ok, enough blabbering about my first epic caramel fail.  I went back to the drawing board the next morning (literally got up uber early and set out to try again, I don't like to fail), and tried for redemption.  Correct ingredients in hand this time, I made another batch, and it came out beautiful!  Best caramel ever!  I made half a batch so I wouldn't waste ingredients if it was a failure, and I made them into little caramels that I wrapped up (didn't have any more apples, as I had wasted them all the night before).  Delicious!  This is the recipe I ended up using to make the caramel apples.

If you are going to wrap them up and give them as party favors like I did, I have included the items to do that.  They were the cutest party favors ever, everyone loved them, and I would do it again in a heart beat!  These would also be wonderful for halloween parties, just melt some orange candy melts instead of the white chocolate. If you end up having extra caramel left after you dip them all, line an 8x8" baking pan with parchment paper and just pour it right in and stick it in the fridge to firm up.

IF YOU LIKE THIS RECIPE, PLEASE DON'T FORGET TO PIN IT :)

Party Caramel Apples

Ingredients:

Caramel:
(Adapted from Chewy Caramel from All Recipes)
  • 1 cup butter or margarine
  • 1 pound light brown sugar
  • 1 (14 ounce) can sweetened condensed milk
  • 1 cup light corn syrup
  • 1 pinch salt
  • 1 1/2 teaspoons vanilla extract
Apples:
  • 12 medium-large tart-sweet apples like grannysmith
  • 12 bamboo caramel apple sticks (Michael's craft store)
Chocolate Drizzle:
  • 8 oz semi sweet chocolate chips
  • 8 oz white chocolate chips
Equipment:
  • Parchment paper
  • Candy thermometer
  • Clear plastic goody bags (Michael's craft store)
  • Cookie sheet tray
 Directions:

Apples:
  1. Prep the apples first thing.  Wash all apples well with dish soap or veggie cleaner, rubbing and rinsing well to get off the wax coating.  Dry the apples very very well.
  2. Place on a parchment lined cookie sheet tray and push a bamboo stick into each apple, parallel to the stem and right next to it as well.
Caramel:
  1. In a heavy bottomed saucepan over medium heat, combine the butter, brown sugar, sweetened condensed milk, corn syrup and salt. Bring to a boil, stirring constantly. Heat to between 242 and 245 degrees F.  Cook for 2 minutes at that temperature. Remove from the heat and stir in vanilla. 
  2. Let the caramel cool until it thickens slightly.  If you dip the apples in it while it is nuclear hot, it will just run right off onto the pan.  When it has thickened, take an apple and while tilting the pan with the caramel a bit,  spin the apple in the caramel until all the sides and most of the way up has been coated.
  3. Remove the apple from the caramel and give it a few spins and twist to allow any excess caramel to drip off.  Place back on the parchment paper lined tray and repeat with remaining apples.  If the caramel starts to get to stiff, but back on the stove on low, stirring, until it loosens up again.
  4. There will probably be bubbles that start to form on the apples, don't panic, the apples give off gasses that cause them, nothing is wrong.  Since it is being covered with chocolate, no one will even see.  If it really bugs, then use a toothpick and pop the bubbles if you would like.
  5. Let the apples harden at room temperature or in the fridge if you have room.
Chocolate and Decorating:
  1. When the caramel is almost done setting up on the apples, place the semi sweet chocolate in a microwave safe bowl and microwave in 30 second increments, stirring in between until melted.  Repeat in a separate bowl for white chocolate.
  2. In a sandwich size ziploc bag, pour the semi sweet chocolate in, twist the top closed, invert, and cut an 1/8 inch off the corner of the bag.  Drizzle the chocolate over the tops of the caramel apples, I used a swooping kind of motion, like making a cursive W all around the top.
  3. Repeat this same ziploc and drizzle procedure with the white chocolate.
  4. Once all the apples have been decorated, place in fridge and allow the chocolate to set up completely, usually an hour or two.
  5. Once it is set up, the apples can be  placed into the clear goodie bags, secured with the accompanying twist tie.
  6. I had printable stickers for my son's birthday theme (Curious George), so I stuck ones on that said "Thank you" so they would know it was a party favor for coming.  Worked great!
 
Finished party caramel apples.  Loved them!

Saturday, August 25, 2012

White Chocolate Gingerbread Truffles

Pin It Now!
To continue my exploration of ways to use the cookie butter from Trader Joe's, I have now subjected it to the wonderful world of truffles.  Since cookie butter is essentially gingerbread cookies in a peanut butter like spread, these truffles scream fall, and would be a wonderful addition to the holiday goodie list.  A little sprinkle of cinnamon on top is the perfect fall touch.


IF YOU LIKE THIS RECIPE, PLEASE DON'T FORGET TO PIN IT :)

WHITE CHOCOLATE GINGERBREAD TRUFFLES

Makes approximately 24, 2 tsp truffles

Ingredients:
  • 14 graham cracker sheets (about 1 1/2 sleeves)
  • 4 oz. cream cheese or neufchatel cheese
  • 1/2 jar cookie butter (from Trader Joe's)
  • 1 (11 oz.) package white chocolate chips
  • ground cinnamon, for sprinkling
Directions:
  1. In a food processor combine graham crackers, cream cheese, and cookie butter and process until well combined.
  2. Using a 2 tsp cookie dough scoop, scoop out the centers and place on a foil or parchment paper lined cookie sheet.  Place in refrigerator for about 30-60 minutes, until easier to handle.
  3. Roll each center into a rounder ball.
  4. Melt the chocolate in a microwave safe dish in 30 second increments, stirring in between, until melted and pourable.
  5. Place a truffle center in the chocolate and roll around to coat, using a fork.  Shake off excess and return to sheet pan.  Sprinkle with light dusting of cinnamon.  Repeat with remaining centers, reheating the chocolate if it becomes to solid to work with.
  6. Refrigerate until chocolate is set up and hardened, keep refrigerated.


Wednesday, August 15, 2012

Double Chocolate Zucchini Brownies

Pin It Now!

Sometimes what my toddler will eat surprises the heck out of me, like the fact that he has beef jerky radar and will be my husbands best and most attentive friend the moment that package opens.  Unfortunately when it comes to vegetables, his likes are limited to peas (definitely did not get that from me) and corn (I use the term vegetable very loosely).  He did however get blessed with my sweet tooth (sorry kiddo).  When I saw the recipe for Triple Chocolate Zucchini Brownies from Sweet Pea's Kitchen, I thought that maybe I could sneak some veggies in him (and my husband and I) that way instead. 

I did not have white chocolate chips, nor do we really like nuts in our brownies, so hence the "double" instead of "triple" chocolate brownie.  I am posting the recipe exactly as written from Sweet Pea's Kitchen though, because why mess with a good thing if you don't have to.

I made these in a 9x13 and cut them into 24 brownies just to make the calories less per serving.  Do whatever works for you, I am just used to thinner brownies.  They came out absolutely the most moist brownies I have ever had, were wonderfully chocolatey, and the zucchini was hardly noticeable, if at all.  I would love to freeze them and try them, I think it would awesome and extra fudgey that way too.  My son liked them and never said anything about anything green in them :)  If you have some zucchini laying around and a terrible chocolate tooth like me, this is the best of both worlds! Another win for Sweet Pea's Kitchen!

P.S.- Don't worry if you mix all the ingredients together (before adding the zucchini) and it is a very stiff paste.  Once you add the zucchini, there is so much moisture in them that a minute of stirring and you will have something that resembles the brownie batter we all know and love.

Triple (or Double) Chocolate Zucchini Brownies
(From Sweet Pea's Kitchen)
 
Ingredients:
  • 1 cup all-purpose flour
  • 1/4 cup unsweetened dark cocoa powder
  • 1 ½ teaspoons baking soda
  • 1/4 teaspoon salt
  • 1/4 teaspoon allspice
  • 1/4 teaspoon cinnamon
  • 1 large egg
  • 1 cup sugar
  • 2 teaspoons vanilla extract
  • 1/4 cup vegetable oil
  • 2 cups shredded zucchini (leave the skin on and use the small holes of the grater)
  • 1/2 cup chopped walnuts
  • 1/2 cup white chocolate chips
  • 1/2 cup semisweet chocolate chips
Directions:

  1. Preheat oven to 350F. Butter the bottom and sides of an 8X8 inch metal baking pan (or a 9x13 for thin brownies). Put a long piece of parchment paper in the bottom of the pan, letting the parchment extend up two sides of the pan and overhang slightly on both ends. Place another piece of parchment paper in the same manner, perpendicular to the first sheet. (This will make it easy to remove the bars from the pan after they have baked.)
  2. In a medium bowl, whisk together the flour, cocoa powder, baking soda, salt, allspice and cinnamon; set aside.
  3. In a large bowl, whisk together the egg, sugar, vanilla, and oil until combined, about 15 seconds. Stir in the flour mixture until just combined (batter will be thick). Fold in the zucchini, walnuts, white chocolate and semisweet chocolate chips. Pour mixture into prepared pan, spread into corners, and level surface with rubber spatula; bake until slightly puffed and toothpick inserted in center comes out with a small amount of sticky crumbs clinging to it, 35 to 40 minutes (about 32 min for 9x13). Cool on wire rack to room temperature, about 2 hours.
  4. Using parchment overhang, lift brownies from pan. Cut into squares and serve.
Yields: 16 brownies (or 24 thin brownies from the 9x13)

Saturday, August 11, 2012

S'mores Truffles

Pin It Now!

I know, I know.  I am a day late and a dollar short for having these up for National S'mores Day.  Well, with two kids 3 and under, this is the best I can do.

Now that that is out of the way....these are absolutely sinful!!!!  I think this is the only way I ever want to eat something labeled "s'mores" ever again.  Five ingredients, couldn't be more simple, and they taste sooooooo good.  I am going to cut right to the chase.  Here is the recipe, and if I ever go camping, people can expect to see these with me instead of the graham crackers, marshmallows on a stick, and Hershey's chocolate bars.

S'mores Truffles

Makes approx. 36 truffles

Ingredients:
  • 2 sleeves graham crackers (18 sheets)
  • 1 (8 oz) package cream cheese (or the lower fat neufchatel cheese)
  • 3 cups mini marshmallows, divided, plus approximately 36 for the tops
  • 2 Tbs. butter 
  • 10 -12 oz semi-sweet or milk chocolate chips (depending on how thick of a chocolate shell you do)
Directions:
  1. In a food processor place the graham crackers and 1 cup of the mini marshmallows.  Pulse until the graham crackers are finely ground, the marshmallows will still be in big pieces or whole, but don't worry.
  2. In a large microwave safe bowl place the remaining 2 cups of marshmallows, butter, and cream cheese.  Microwave in 30 second increments, stirring after each, until everything is melted and incorprated.
  3. Pour the marshmallow mixture into the food processor.  Process until everything is combined and forms a dough/paste.
  4. Using a 2 tsp. cookie dough scooper, scoop out the truffle centers onto a baking sheet lined with parchment paper, don't worry about making them round or anything.
  5. Place in refrigerator for 1-2 hours, or until firm enough to handle.
  6. Remove from fridge and roll each mound into a smooth ball.
  7. Place chocolate chips in a microwave safe bowl and heat in 30 second increments, stirring after each one, until they are melted.
  8. Using a fork, carefully roll each truffle center in the chocolate, using the fork to coat, and then shaking off the extra chocolate carefully.  Place back on tray.  Repeat for remaining centers.
  9. Top each one with a mini marshmallow and place back in fridge until set.  
  10. Once set, enjoy! 
  11. Keep refrigerated.

Wednesday, August 8, 2012

Chocolate Lined Waffle Cone Fruit Bowls

Pin It Now!

While researching for ideas for my son's 3rd birthday party, I came across a great idea on pinterest.  Put cut up fruit in a waffle cone (like the big ones that you get at the ice cream store), instead of a regular bowl or plate.  I thought that was great (I love waffle cones).  So when it came time, I went to the store and stood in front of the ice cream cone section, pondering my options.  There were big ones, small ones, cheap ones, expensive ones, so many choices.  And then, my sister looks at me and says "How about the waffle bowls, they will sit nicer."  Oh my gosh!  Total epiphany!  Duh, bowls would be so much easier!  So I bought 4 boxes.

On the day of the party, we made a yummy fruit salad from watermelon, strawberries, nectarines, and grapes.  As people were getting their lunch we filled the bowls so they wouldn't get soggy.  They looked great, they were yummy, and who doesn't like a waffle cone?  Unfortunately, the bottoms did get soggy on the ones that sat for a bit (I know what your thinking, why would you put watermelon in them if you didn't want them to get soggy? Easy-I needed filler :)  )  Well, I still think these are a great, easy, and fun way to present fruit salad for a party, but I had a stroke of brilliance last night, and can now solve the soggy bottoms problem.  ADD CHOCOLATE!  Yes, you heard me right, add chocolate.  Just like a drum stick ice cream cone.  They line them with chocolate so they don't get soggy.  When I do these again, I will do the same.  Waffle cone, fruit, AND chocolate, man it just keeps getting better!

To make ones that don't get soggy, here is what I would do:

If you like this, don't forget to Pin it!

Chocolate Lined Waffle Cone Fruit Cups

Ingredients:
  • 1 package waffle cone bowls (approximately 10 bowls)
  • 1 (12 oz) package semi sweet or milk chocolate chips
  • Cut up fresh fruit
Directions:
  1. Melt chocolate chips in the microwave in 30 second increments until completely melted, stirring in between.
  2. Pour a spoonful of chocolate into a waffle bowl, and either tilt the bowl to distribute the chocolate evenly over the inside, or use a spoon or knife to spread it out over the inside.  
  3. Repeat with remaining bowls.
  4. Place in fridge until the chocolate hardens again.
  5. Remove from fridge and fill with the cut up fruit right before serving.
  6. Enjoy!  If there is any chocolate left, it can always be remelted and drizzled on top of the fruit for a little extra indulgence.

Tuesday, August 7, 2012

Hot Fudge Sauce: The Search for Thrifty's Marble Fudge

Pin It Now!

Thrifty's ice cream.  The dessert childhood memories are made of.  The counter of colorful ice cream choices, the perfect shaped scoop, the drool worthy flavors....in short, perfection.  This is what makes up my husbands childhood memories and his adult dessert desires.  Particularly, marble fudge ice cream from Thrifty's.  Sadly, they discontinued it in their cases, and now you can only buy it in the large 5 gallon tubs or whatever big plastic bucket size that is.  Unfortunately we don't have room in our freezer, otherwise I am sure he would not mind if I kept a stock of it in there.

Upon fear that someday RiteAid will stop carrying even the large container, he told me that if I could work on one  recipe to perfect, it would be to make a copy of Thrifty's marble fudge ice cream.  Of course I am more than happy to take up the challenge in the name of love and all things ice cream and chocolate.  I mean really, how bad can it be to have to taste test copious amounts of hot fudge recipes?  Yea, not too bad I imagine.  Speaking of hot fudge, that is where I decided I needed to start, because for my husband, it was that ooey gooey slightly crystalized ribbon of fudge running through Thrifty's vanilla ice cream that made it the quintessentially perfect food for my husband.  The thing memories are made of.  Seems like a logical place to start.

Here is the first recipe I tried.  Upon starting my research I realized that there are so many ways to make hot fudge it isn't even funny.  With cream?  With Cocoa?  With corn syrup and no cream?  With chocolate chips?  I had to find out what kind of ingredients Thrifty's was using to even have a hope of getting close.  I managed to find a picture of the lid of one of the buckets of marble fudge ice cream online (gotta love the internet!) and was able to discern the ice cream ingredients as well as their fudge swirl ingredients.  The fudge ingredients are: corn syrup, cocoa powder, water, sugar, and salt.  Well, least I had a starting point now.  The ice cream uses cream and skim milk, so it is a much less rich ice cream then some, so that could also affect how the fudge sets up in it, but I will get to that problem later.

Once I knew the ingredients, I started scouring the internet for recipes that contained those ingredients, and nothing else that was really significant.  Low and behold, I came across one of my fav food blogs, Smitten Kitchen.  Her hot fudge sauce recipe had all these ingredients, plus the addition of a bit of butter, and some vanilla (or rum or other flavoring).  Close enough, so I thought I would give it a try.

My husband thought it was very very good, but more of a hot fudge sundae, less marble fudge swirl.  He thought it was too chocolaty.  That may be slightly problematic, seeing as it is a fudge swirl I am trying to copy, but to his point, they probably weren't doling out huge amounts of chocolate to use in the making of it, so maybe I should set my sites a little less gourmet, and a little more, well, Thrifty :)  Granted, it was in Dreyer's vanilla ice cream, not Thrifty's, and I don't think the sauce had even cooled all the way before he was more than happy to taste test it, so that may have influenced it.  I am sure it will get a second taste test.  For now though, back to the drawing board.  Maybe I will try to make my own recipe, with only the ingredients listed on their ice cream, and see what happens....but that I could see being a disaster.  Maybe a little bit more research before I do that.

In the mean time, this is by far the tastiest hot fudge recipe I have ever tasted, so please, enjoy it, even if you are a die hard Thrifty's marble fudge ice cream fan, this will still make one heck of a happy hot fudge sundae.

I will continue on my quest of trying different recipes in hopes of replicating Thirfty's fudge swirl, and I promise to keep everyone apprised of my progress.

IF YOU LIKE THIS RECIPE, PLEASE DON'T FORGET TO PIN IT :)

Hot Fudge Sauce

Adapted from Silver Palate Cookbook via Smitten Kitchen

Yields 2 1/2 cups

This is a deep, dark fudgy bittersweet sauce that firms up on ice cream.

4 ounces unsweetened chocolate
3 tablespoons butter, unsalted
2/3 cup water
1/3 cup sugar
6 tablespoons corn syrup
Pinch of salt
1 tablespoon rum (or other flavoring, such as a flavored liquer or vanilla extract)

Melt the chocolate and butter very slowly in a double boiler or in the microwave, stirring frequently until combined.

Meanwhile, heat the water to boiling in the small, heavy saucepan. When the butter and chocolate have melted, stir the mixture into the boiling water.

Add the sugar, corn syrup and salt and mix until smooth. Turn the heat up and stir until mixture starts to boil; adjust heat so that sauce is just maintained at the boiling point, stirring occasionally.

Allow sauce to boil for nine minutes.

Remove from heat and cool for 15 minutes. Stir in the rum (or vanilla) and serve warm over ice cream.

Do ahead: Sauce can be easily and quickly reheated in the microwave for 15 to 30 seconds. Stir and it will be shiny and even again.

Thursday, August 2, 2012

Double Chocolate Banana Muffins

Pin It Now!

I love chocolate.  If I can make something and somehow make it chocolatey, all the better I say!  I love making banana muffins.  Inevitably, I always have some ripening bananas lying around begging to be used.  Unfortunately, after making plain banana muffins dozens of times, I am kind of bored with the same old same old.  Then I had a brilliant thought.  Add chocolate!  It makes everything better.  I took one of my current  favorite banana muffin recipes, King Arthur Flour's Banana Muffin recipe, and after a nice online chat with one of the bakers there, set out to turn them in to double chocolate banana muffins.  The lovely baker on the other end of the online chat box gave me some measurements for adding cocoa to their recipe, I took it one step further and guiltlessly dumped a whole package of chocolate chips into the batter (I made a double recipe since I had like ten overripe bananas to use, otherwise a half a bag of chocolate chips is called for).

I think these still qualify as a good breakfast food, right?  I mean it has oat bran and bananas, ergo, must be a healthy breakfast food.  Ok, at least a yummy breakfast food.

Enjoy these moist, chocolatey, banana-y muffins.  If you want a finer texture, throw the oat bran in the food processor to make it finer, otherwise it will have a heartier texture to the muffins.  

Double Chocolate Banana Muffins Recipe

Makes approximately 16-20 per batch, depending on how full the muffin cups are.

Ingredients:
  • 1/2 cup yogurt (I used Fage 0% Greek yogurt)
  • 1 large egg
  • 2 Tbs. vegetable oil
  • 1/2 snack container natural applesauce (no sugar added) or 1/3 cup*
  • 1 1/2 cups mashed banana; 2 to 3 large bananas
  • ¾ cup granulated sugar
  • 1 cup oat bran (If you don't have this, grind up rolled oats in a food processor)
  • 1 1/2 cups All-Purpose Flour
  • 1/3 cup dutch process cocoa powder
  • 2 teaspoons baking powder
  • ½ teaspoon salt
  • ½ teaspoon baking soda
  • 1/4 teaspoon cinnamon (optional)
  • 6 oz. semi sweet chocolate chips 

  • *If you double the recipe, I used 2 Tbs. vegetable oil, and a whole snack size container of applesauce, which is a little less than half a cup.  If you don't have or don't want to use applesauce, use 1/4 oil for a single recipe.  I like the applesauce to cut down on fat and calories, and I can never tell a difference.

    Directions:


    1) Preheat the oven to 375°F. Grease a standard muffin tin, or line with papers and grease the papers.
     2) Combine the yogurt, egg, oil, applesauce, mashed banana, sugar, and oat bran in a bowl. Whisk together and set aside for 10 minutes.
    3) Whisk together the flour, baking powder, salt, baking soda, cinnamon, and cocoa.
    4) Whisk the banana mixture into the flour mixture.  Mix in chocolate chips. Scoop into the prepared muffin cups, filling them almost full; the muffins won't rise much.
    5) Bake the muffins for 20 to 24 minutes, until the muffins are set and browned. Remove from the oven and let rest in the pan for 5 minutes. Remove from the pan and enjoy warm.
     

Monday, July 30, 2012

S'mores Crispy Rice Treats

Pin It Now!

Ah, camping.  The fond memories of dirt, showers that charge $0.50 for two minutes of (sometimes) hot water, and who can forget: the food!  Particularly the food that seems to be synonymous with camping, the s'more.  I had fun burning the marshmallows and all, but frankly, I found them messy, unwieldy, and just kind of a pain.  Well, pain no more!  I have combined the best of the s'more world with all that is wonderful about rice crispy treats.  I mean come on, a rice crispy treat is 1/3 of the way to becoming a s'more, right?  Here is a recipe that is easy to prep before leaving on a camping trip, travels well, and if you have little ones, gives them all the s'more flavor, without the fire hazard.
 

S'more Crispy Rice Treats

Ingredients:
  • 1 package (9 sheets) graham crackers
  • 1 bag (10 oz.) mini marshmallows, divided
  • 12 oz. semi-sweet or milk chocolate chips
  • 2 tablespoons butter
  • 6 cups rice crispies cereal
Directions:
  1. Line a 9x13 in pan with parchment paper, or spray with non-stick cooking spray, set aside.
  2. Crush the graham crackers into fairly small crumbs, some larger pieces are ok (I just did it right in the bag they were in, why dirty another bag or bowl?).
  3. Mix the cereal and crushed graham crackers in a large bowl, as well as 1 cup of the marshmallows.
  4. Place all the remaining marshmallows and the butter in a large microwave safe bowl, and heat in 30 second increments, stirring in between, until the marshmallows are completely melted and the butter is incorporated.
  5. Pour the marshmallow mixture into the cereal and graham cracker mix, and stir until well combined.
  6.  Pour into the prepared pan and press into the pan to form an even layer.  Spraying a spatula with non-stick cooking spray may help in spreading if it is sticking.
  7. Place chocolate chips in a microwave safe bowl and heat in 30 second increments, stirring in between, until completely melted.  
  8. Pour chocolate over the cereal mixture and smooth out over the entire pan.
  9. Let them set up in the fridge or on the counter until the chocolate and marshmallows are set.
  10. Cut into squares and enjoy!

Thursday, July 19, 2012

Party Favor Caramel Apples--Sneak Preview

Pin It Now!

Here is a little teaser from my son's 3rd birthday party coming up on Saturday.  I made these to give as party favors for the guests.  Homemade caramel with chocolate and white chocolate drizzle.  I can't wait for his party!  There will be a nice long post with lots of pictures but for now, I leave you with this :)

Wednesday, July 11, 2012

Nutella Oreo Truffles

Pin It Now!

Having made homemade nutella the day before, I was then presented with the dilemma of what to do with all that nutella.  Make truffles of course!  I had some fantastic oreo truffles at a family get together on fourth of July, and thought that those may be something that could work with the nutella instead of cream cheese (we don't eat a lot of cheese products or dairy products in our house for the most part).  So I said what the heck, and went to work.

These did not come out as moist as the ones with cream cheese, they were more cake-like than truffle like.  I think that can be remedied by adding more nutella (my homemade nutella was not as thin in consistency as store bought, so if you use store bought, that may help negate having to add extra).  Moist or cakey, they were still tasty!  Not too strong on the hazelnut flavor, but if you were real adventurous you could stick a whole toasted hazelnut in the center.

Here is the recipe, adjust the amounts to suit your desired consistency.

Recipe:

Makes approximately 49 truffles

11 oz homemade nutella spread or store bought (adjust amount for desired consistency)
1 15 oz package oreo cookies
14 oz semi sweet-chocolate chips, white chocolate chips, or dark chocolate chips (I used semi-sweet)

Directions:

  1. In a food processor, process the oreo cookies in to a fine crumb.
  2. Add in the nutella and process until the mix comes together.
  3. Using a 2 tsp cookie scoop, scoop out the mix (make sure to press it into the scoop well), release the mix into your hand and compress and roll into a ball.  Place on cookie sheet lined with parchment paper.
  4. Once all the mix is rolled out, melt the chocolate chips in a microwave safe bowl in 30 second intervals until melted.
  5. Using two forks, roll each ball in the chocolate, remove excess, place back on lined cookie sheet.  
  6. When finished, sprinkle some crushed oreos over the top if desired.
  7. Place in fridge to set.  Store in fridge.

Nutrition (as written):

Calories: 106 cal
Fat: 6 g
Carbs: 14 g
Protein: 1 g
Fiber: 1 g


Thursday, June 28, 2012

Chocolate Covered Apple Pie Caramels

Pin It Now!

I know I know, my pictures suck.  I am working on it, and they will hopefully get better soon. 

Now that that is out of the way, here is a new recipe I found from Blondie's Cakes called Apple Cider Caramels.  Could it be, the best of both worlds, together in one??  Yep!  After days of having this web page open on my computer...taunting me, I finally gave in last night and had to make them.

After a long time over the stove stirring, I was well rewarded.  These little caramel gems taste like apple pie, stuffed in a chewy, rich caramel.  That is all well and good, but I thought it could be better.  So I dipped them in semi-sweet chocolate too.  Now are are talking apple pie meets chocolate and caramel covered apple.  Happy, happy day!  I covered half, left the other half naked, and I enjoy them either way.  This is definitely going in my holiday/special occasion recipe folder, because it just screams happy holidays! (Hey, fourth of july is a holiday, right?  Close enough.)

I modified the recipe ingredients a bit from the original, so here it is with the modifications.

CHOCOLATE COVERED APPLE PIE CARAMELS


Ingredients:

1/3 cup frozen apple juice concentrate, thawed
1 cup evaporated milk, 2%, divided (2/3 cup and 1/3 cup)
1 tsp ground cinnamon
Pinch nutmeg
1/4 tsp allspice
1 1/2 cup brown sugar
1/3 cup light corn syrup
1/2 cup real butter, cubed

Chocolate coating (to cover whole batch):

12 oz. semi-sweet, dark, or milk chocolate chips
1 tbs butter

Directions:


- Line an 8" square pan with parchment paper, making sure to leave about 1" hanging over the edges for easy removal.

- In a small bowl, combine 2/3 c. evaporated milk, cinnamon, nutmeg, allspice, and apple juice concentrate. Set aside.

- In a large, heavy saucepan, combine the sugar, 1/3 c. evaporated milk + enough water to reach the 1/2 c. line on the measuring cup, and corn syrup. Cook over low heat until the sugar dissolves. Insert the candy thermometer and simmer until the syrup reaches 234 degrees.

- Remove from heat and slowly whisk in the cream mixture. Add the cubed butter and stir until the milk and butter are fully incorporated. Return the pan to heat and re-insert the candy thermometer. Cook over low heat, stirring frequently, until the temperature reaches 246 degrees.

- Remove from heat and pour the caramel into the prepared pan. Let the mixture cool completely at room temperature or in the refrigerator. I covered the top of the pan loosely with saran wrap. I cut it into 64 squares.  Wrap each in wax or parchment paper and store in fridge, leave unwrapped in an air tight container in the fridge, cover in chocolate* and store in the fridge, whatever floats your boat.  Stores in fridge up to two weeks.

*To cover in chocolate, cut into desired sizes once cool.  Melt the coating ingredients together in 30 second intervals in the microwave until melted.  Using two forks, dip caramels in the chocolate and place on a parchment lined baking sheet.  Refrigerate until the chocolate sets.  Store in fridge.


Nutrition information (uncovered caramels, 64 servings)

  Calories-48  Carbs-9    Fat-2 g    Protein-0g


Related Posts Plugin for WordPress, Blogger...