Thursday, August 30, 2012

Mini Chocolate Cupcakes with Nutella Cheesecake Frosting

Pin It Now!

My son's 1st birthday party is next week so I am starting to work on desserts for the party.  Coincidentally, the party is a dessert-only party.  Thought I would make it easier on myself since I went all out on my 3 year old's birthday party last month (see pictures here).  I saw a recipe for no-bake nutella cheesecakes from My Baking Addiction and really wanted to make those, which I still might, but then I thought, how good would a lighter version of that cheesecake filling be as a frosting for chocolate cake?  Well let me tell you:  Really good!  The frosting takes like  5 minutes to make, I will definitely be using it again.  Combine that with a boxed devil's food cake mix and some oreo cookie crumbs, and this is one classy dessert with no effort at all!

For me this made 70 mini cupcakes, but depending on how much frosting you use, it may need to be doubled.  I used mini cupcake liners from Wilton that I found at target.

MINI CHOCOLATE CUPCAKES WITH NUTELLA CHEESECAKE FROSTING
(Adapted from My Baking Addiction)

Ingredients:
  • 1 box devil's food cake mix, prepared as instructed on box
  • 3/4 cup nutella spread
  • 1 (8 oz.) block cream cheese
  • 1 tsp vanilla
  • 16 oz cool whip, thawed
  • 5-6 oreo cookies with the cream center removed
Directions:
  1. Using the prepared cake batter, fill mini muffin tin cups 3/4 full.  Bake at 325 degrees F for about 12-14 minutes, or until a toothpick inserted in the center comes out clean.
  2. For the frosting, in a medium bowl mix cream cheese, nutella and vanilla until well combined and smooth, using either a spatula or hand mixer.
  3. Add the cool whip and fold in until there are no streaks remaining.
  4. I used a piping bag to add the frosting to the cupcakes, but a ziploc bag with the corner cut will work great too.
  5. Crush the oreo cookies and sprinkle over frosting.
  6. Store in refrigerator until ready to eat.

Monday, August 27, 2012

Party Caramel Apples: Recipe and How to

Pin It Now!

First, A Story of Failure (Learn from My Mistakes)

For my son's 3rd birthday party I had it in my head that I had to make caramel apples.  Had to be homemade, had to have chocolate, and I had to make them for the party.  No negotiating, I just had to make them.  In preparation for making them, I tried a few caramel recipes.  The first recipe I tried  smelled good, went on the apples well enough, but when it hardened, it turned into a grainy disaster, that crumbled when you bit, pulled, or chewed it, instead of being that wonderful chewy caramelly goodness.

They look ok, the ones that the caramel actually stayed on, but they had an awful texture.
 I wasn't sure what I had done wrong.  I didn't have corn syrup when I made this batch (one of the main ingredients), so in my infinite wisdom I looked it up on the internet how to substitute it, and the site I looked at said just add x amount of sugar and y amount of water in place of the corn syrup called for, and it will be all good.  Upon further reflection, and research, after this bombed batch, I found out that the site left out something important about subbing that for corn syrup:  the very important part about boiling those to things to a softball stage and THEN adding it to the other ingredients in place of corn syrup.  Anyways, two lessons learned: 1) don't believe every substitution you see on the internet. 2)  Just go out and by an ingredient if it is going to be that crucial to success.  When making candy, I have decided that there are some substitutions that can't be made, it is too much chemistry dependent.


On to the Party Caramel Apple Success and Recipe

Ok, enough blabbering about my first epic caramel fail.  I went back to the drawing board the next morning (literally got up uber early and set out to try again, I don't like to fail), and tried for redemption.  Correct ingredients in hand this time, I made another batch, and it came out beautiful!  Best caramel ever!  I made half a batch so I wouldn't waste ingredients if it was a failure, and I made them into little caramels that I wrapped up (didn't have any more apples, as I had wasted them all the night before).  Delicious!  This is the recipe I ended up using to make the caramel apples.

If you are going to wrap them up and give them as party favors like I did, I have included the items to do that.  They were the cutest party favors ever, everyone loved them, and I would do it again in a heart beat!  These would also be wonderful for halloween parties, just melt some orange candy melts instead of the white chocolate. If you end up having extra caramel left after you dip them all, line an 8x8" baking pan with parchment paper and just pour it right in and stick it in the fridge to firm up.

IF YOU LIKE THIS RECIPE, PLEASE DON'T FORGET TO PIN IT :)

Party Caramel Apples

Ingredients:

Caramel:
(Adapted from Chewy Caramel from All Recipes)
  • 1 cup butter or margarine
  • 1 pound light brown sugar
  • 1 (14 ounce) can sweetened condensed milk
  • 1 cup light corn syrup
  • 1 pinch salt
  • 1 1/2 teaspoons vanilla extract
Apples:
  • 12 medium-large tart-sweet apples like grannysmith
  • 12 bamboo caramel apple sticks (Michael's craft store)
Chocolate Drizzle:
  • 8 oz semi sweet chocolate chips
  • 8 oz white chocolate chips
Equipment:
  • Parchment paper
  • Candy thermometer
  • Clear plastic goody bags (Michael's craft store)
  • Cookie sheet tray
 Directions:

Apples:
  1. Prep the apples first thing.  Wash all apples well with dish soap or veggie cleaner, rubbing and rinsing well to get off the wax coating.  Dry the apples very very well.
  2. Place on a parchment lined cookie sheet tray and push a bamboo stick into each apple, parallel to the stem and right next to it as well.
Caramel:
  1. In a heavy bottomed saucepan over medium heat, combine the butter, brown sugar, sweetened condensed milk, corn syrup and salt. Bring to a boil, stirring constantly. Heat to between 242 and 245 degrees F.  Cook for 2 minutes at that temperature. Remove from the heat and stir in vanilla. 
  2. Let the caramel cool until it thickens slightly.  If you dip the apples in it while it is nuclear hot, it will just run right off onto the pan.  When it has thickened, take an apple and while tilting the pan with the caramel a bit,  spin the apple in the caramel until all the sides and most of the way up has been coated.
  3. Remove the apple from the caramel and give it a few spins and twist to allow any excess caramel to drip off.  Place back on the parchment paper lined tray and repeat with remaining apples.  If the caramel starts to get to stiff, but back on the stove on low, stirring, until it loosens up again.
  4. There will probably be bubbles that start to form on the apples, don't panic, the apples give off gasses that cause them, nothing is wrong.  Since it is being covered with chocolate, no one will even see.  If it really bugs, then use a toothpick and pop the bubbles if you would like.
  5. Let the apples harden at room temperature or in the fridge if you have room.
Chocolate and Decorating:
  1. When the caramel is almost done setting up on the apples, place the semi sweet chocolate in a microwave safe bowl and microwave in 30 second increments, stirring in between until melted.  Repeat in a separate bowl for white chocolate.
  2. In a sandwich size ziploc bag, pour the semi sweet chocolate in, twist the top closed, invert, and cut an 1/8 inch off the corner of the bag.  Drizzle the chocolate over the tops of the caramel apples, I used a swooping kind of motion, like making a cursive W all around the top.
  3. Repeat this same ziploc and drizzle procedure with the white chocolate.
  4. Once all the apples have been decorated, place in fridge and allow the chocolate to set up completely, usually an hour or two.
  5. Once it is set up, the apples can be  placed into the clear goodie bags, secured with the accompanying twist tie.
  6. I had printable stickers for my son's birthday theme (Curious George), so I stuck ones on that said "Thank you" so they would know it was a party favor for coming.  Worked great!
 
Finished party caramel apples.  Loved them!

No Knead Pumpernickel Rolls

Pin It Now!
 My husband's favorite bread is pumpernickel bread.  Unfortunately, most store bought pumpernickel is, according to him, flavorless and lacking all pumpernickel goodness.  The flavor that he wants in a pumpernickel bread is reminiscent of Einstein's pumpernickel bagels, his favorite!  But unfortunately we are about 90 miles away from the closest Einsteins.  I have been on a mission for years to make a good pumpernickel bread for him.  After more searching, I found a recipe from Artisan Bread in Five for Pumpernickel bread.  Since I love their method so much, I thought I would give it a try.  I made a few changes to it to punch of the flavor even more, and used cocoa instead of caramel color to get the pumpernickel color.  He was thrilled with the results, judging from the fact that three rolls where missing within seconds of me telling him I had made some and they were ready for trying.  They were delightfully crusty, and light and fluffy on the inside, with a wonderful flavor, but not overwhelming.

If you don't want to turn on the oven, use the baking method from my crock pot no knead herb roll recipe here, with this dough.

No Knead Pumpernickel Rolls
(Adapted from Artisan Bread in Five's Pumpernickel recipe here)

Ingredients:
  •  2 1/2 cups whole wheat flour
  • 2 3/4 cups whole grain rye flour (most supermarket rye is whole grain)
  • 2 1/2 cups unbleached all-purpose flour
  • 1 tablespoon kosher salt (increase or decrease to taste)
  • 1 1/2 tablespoons instant yeast (or 2 packets)
  • 2 tablespoons dutch process cocoa
  • 1/4 cup vital wheat gluten
  • 2 tablespoon caraway seeds
  • 2 tablespoons molasses
  • 1/2 tsp onion powder
  • 4 cups lukewarm water
  •  Caraway seeds for sprinkling
  • Corn meal for baking

Directions:
After 2 hours of rising on the counter, slightly bubbly.
After rising for 40 minutes, before slashing
  1.  In a large bowl combine all dry ingredients and  mix well.
  2. Pour in water and molasses and stir until well combined.  The dough will be fairly wet.
  3. Let it sit covered loosely on the counter for a minimum of 2 hours.  Do not punch down dough, or deflate.  It will start to deflate on its own.  After two hours it will look like this:
  4. After two hours it can be placed in the refrigerator for up to seven days.
  5. If it will be being used right away after the two hours, sprinkle the top of the risen dough with a bit of flour for easier removal.  Line a baking sheet with parchment paper and sprinkle with corn meal.
  6. This is a sticky dough, so just flour your hands and the dough balls well to prevent sticking while working with it.  Tear off two ounce pieces and roll them into smooth balls.  Place 2 inches apart on a baking sheet**.  Repeat for desired number of rolls.  Any remaining dough just goes back in the fridge to be used another day.
  7. Preheat the oven to 450 degrees F about 20 minutes before rising is done.  Let the rolls rise for about 40 minutes, or until almost doubled in size and puffy. If the dough has been refrigerated, then let the rolls rise for 90 minutes instead.
  8. When rolls are finished rising, use a serrated knife and make a 1/4 inch deep slash on the top of each roll.  Using a clean spray bottle or a basting brush, cover each roll with cold water and sprinkle the tops with caraway seeds.
  9. Place rolls in the oven.  Bake for approximately 20 minutes, or until they make a hollow sound when tapped.
  10. Let cool for a bit before enjoying.
 

**If you have a pizza stone and like crustier rolls, place the rolls on parchment covered with corn meal and allow to rise.  Preheat oven with pizza stone in the middle of the oven.  When ready to bake, slide the parchment paper onto the baking stone.  For even crustier rolls, place a baking dish in the bottom rack of the oven and when the rolls are put in, quickly pour a cup of water into the pan to generate steam.  A clean water filled spray bottle can be used to squirt water into the oven to generate steam as well.

For more tips on making whole grain breads with this no knead method, check out Artisan Bread in Five's Whole Grain Master Recipe for more information.

Saturday, August 25, 2012

Sweet Confessions Sunday Link Party #4

Pin It Now!
Sweet Confessions Sunday Link Party #4

I am so excited by how many people joined the party this week!  Almost double the week before.  Thank you to all those who come back each week and share their posts, it is such a wonderful event and I look forward to it every week.  Please spread the word, bring your friends, and let's just make this one big party!  It is growing leaps and bounds by the week and it puts such a smile on my face to see how much support everyone in the blogging world gives to others.  Before we start the party though,  let's look at this weeks Sunday Sweet Links Spotlight posts:

Sunday's Sweet Links Spotlight
This honeybun cake from Chocolate, Chocolate , and More  looks like a fantastic way to wake up in the morning!  I remember getting the honey buns from the store as a special treat.  I can't wait to make this for my kids.
 

Chocolate.  Cheesecake. More Chocolate.  This is DEFINITELY the way I want my brownies, and The Recipe Critic has a fantastic Hershey's Cheesecake Brownies recipe that looks like chocolate heaven.


Who wants to be a millionaire?  Well you can be with this recipe for Millionaire Squares from This and That, and they won't break the bank either!  They look like mouth watering goodness.
 
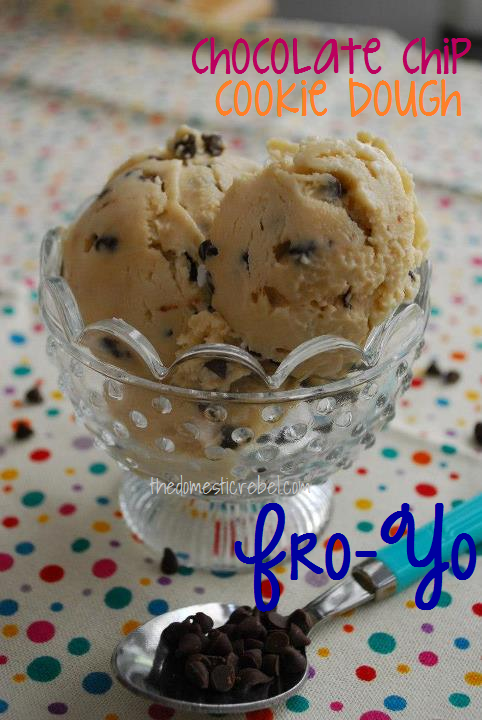
All the healthiness of frozen yogurt with all the sinful deliciousness of cookie dough.  Every cookie dough loving person out there should give this recipe for Lightened Up Chocolate Chip Cookie Dough Fro-Yo from The Domestic Rebel a try.  I have to make this for my kids, ASAP.
 
 
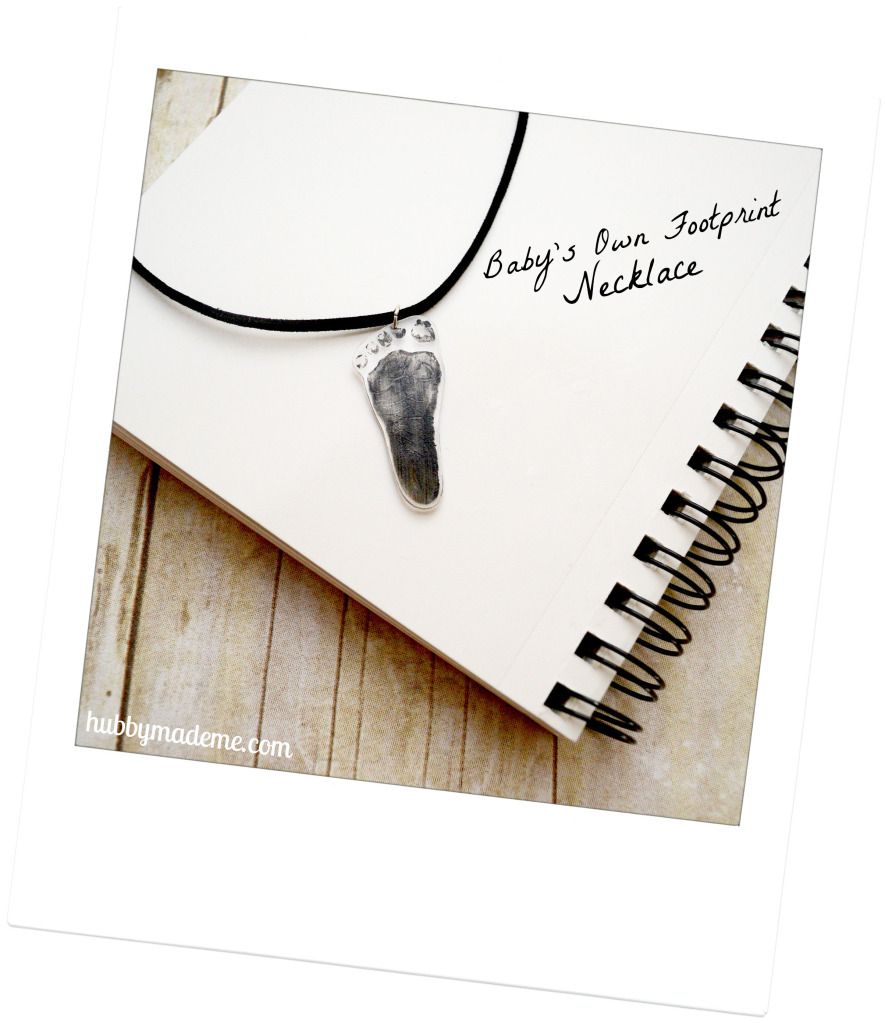
I don't know if there is a necklace that I could have that would be more special and precious than this Baby's Own Footprint Necklace from Hubby Made Me.  Incredibly sweet.


UPDATE:  

With all the great links being posted at the party, I would love to reach more people to share them with and make this one big link party bash.  To do this, I would love to encourage all of those participating to invite a friend, or lots!  The person at the end of the week who has referred the most people to the party will have their blog featured on the Mommy's Sweet Confessions Facebook page, be tweeted about, and also have a feature blog post about their blog.  To do this it is easy, just:

1) Spread the word about the Sunday's Sweet Confessions Link Party.
2) Have your friends link up some of their great ideas.
3) Make sure to ask them to leave a comment at the party saying what blog sent them.

At the end of the party I will total everything up and feature the blog with the most referrals. 

Thank you so much for being such a great help in growing this party!  Lots of love to you all!


White Chocolate Gingerbread Truffles

Pin It Now!
To continue my exploration of ways to use the cookie butter from Trader Joe's, I have now subjected it to the wonderful world of truffles.  Since cookie butter is essentially gingerbread cookies in a peanut butter like spread, these truffles scream fall, and would be a wonderful addition to the holiday goodie list.  A little sprinkle of cinnamon on top is the perfect fall touch.


IF YOU LIKE THIS RECIPE, PLEASE DON'T FORGET TO PIN IT :)

WHITE CHOCOLATE GINGERBREAD TRUFFLES

Makes approximately 24, 2 tsp truffles

Ingredients:
  • 14 graham cracker sheets (about 1 1/2 sleeves)
  • 4 oz. cream cheese or neufchatel cheese
  • 1/2 jar cookie butter (from Trader Joe's)
  • 1 (11 oz.) package white chocolate chips
  • ground cinnamon, for sprinkling
Directions:
  1. In a food processor combine graham crackers, cream cheese, and cookie butter and process until well combined.
  2. Using a 2 tsp cookie dough scoop, scoop out the centers and place on a foil or parchment paper lined cookie sheet.  Place in refrigerator for about 30-60 minutes, until easier to handle.
  3. Roll each center into a rounder ball.
  4. Melt the chocolate in a microwave safe dish in 30 second increments, stirring in between, until melted and pourable.
  5. Place a truffle center in the chocolate and roll around to coat, using a fork.  Shake off excess and return to sheet pan.  Sprinkle with light dusting of cinnamon.  Repeat with remaining centers, reheating the chocolate if it becomes to solid to work with.
  6. Refrigerate until chocolate is set up and hardened, keep refrigerated.


Friday, August 24, 2012

Homemade English Muffins

Pin It Now!

Nothing screams breakfast food like an English muffin slathered in boysenberry jam and butter, at least in my house.   I used to by them by the two pack at Costco, and go through them in a week.  They are so incredibly versatile they worked for every meal.  English muffin sandwiches with eggs, cheese, and bacon for breakfast, or mini english muffin pizzas for lunch, or as a bun for a hamburger at dinner.  They are the perfect bread item.

Imagine my absolute astonishment when I found out that not only can you make these at home, but they are easy, and 100 times tastier!  I now refuse to by English muffins.  Every other week or so I make a double or triple batch.  We eat a bunch right then and there, I send some home with my mother-in-law, some to my parents, and stick the rest in the freezer.  A few seconds in the microwave and they are good as new.  Here is a care package I sent with my parents the morning of a road trip they were taking to Vegas.  Some English muffins hot out of the skillet, banana chocolate chip mookies, s'mores truffles, and some butter and black raspberry jam for the English muffins.

As I confessed in my first ever post, I am a King Arthur Flour recipe and product addict.  If I had to move somewhere in the country, away from my wonderful Southern California spot, it would be Vermont.  For the sole reason that this is where King Arthur Flour's bakery and shop is located.  This would be my dream job.  Anyways, enough daydreaming.  This recipe is their creation.  I do it by hand with no stand mixer, just a little elbow grease, but believe me, it is doable and worth it.  The recipe from KAF was written for a bread machine, but I have adapted it for no equipment necessary.  If you want to prep the dough in a bread machine, check out the link below. 

Just a note though: To get the traditional English muffin nooks and cranny's, make sure you use a fork to split them, because you wont get them if you cut it with a knife.  Or, you can just do it my husbands way and grab one warm out of the skillet and eat it plain, no waiting for splitting or toppings of any kind.

IF YOU LIKE THIS RECIPE, PLEASE DON'T FORGET TO PIN IT :)

English Muffins  
(Adapted from King Arthur Flour's English Muffin Recipe)


Ingredients:

  • 1 3/4 cups (14 ounces) milk, warm (can sub soy milk)
  • 3 tablespoons (1 1/2 ounces) butter (or shortening, or vegan butter like earth balance sticks)
  • 1 1/4 teaspoons salt
  • 2 tablespoons (7/8 ounce) granulated sugar
  • 1 large egg, lightly beaten
  • 4 to 4 1/4 cups (17 to 18 ounces) Unbleached Bread Flour (if you don't have bread flour, all purpose will work, but the texture will be a bit different
  •  2 teaspoons instant yeast (*if you don't have instant yeast, make sure to proof your yeast for 5 minutes with the milk and sugar first before incorporating the rest of the ingredients)

    **You will also need cornmeal for covering the surface of the pans.

Directions:

  1. Place the ingredients in a large bowl and combine thoroughly.  Knead for 5-7 minutes by hand, until it is fairly smooth and when poked quickly, the dent starts to spring back.  If you want to do it in a stand mixer, place all ingredients in the bowl and after mixed, use a dough hook and let it go for 5 minutes on medium high.  If you want to let it rise in the fridge overnight for use the next morning, proceed to step 2.  Otherwise, let this rise for an hour or until it has doubled in volume.
  2. To rise in fridge for next day use:  Stick this dough in the fridge until the next morning, without letting it do the first rising.  I like to make the dough the night before, do the kneading, then let it do its first rise in the fridge over night.  In the morning take the dough out, and proceed with step 3, just let the muffins rise a bit longer after they have been cut into the circles.
  3. Transfer the dough to a cornmeal-sprinkled surface and roll it out until it's about 1/2-inch thick. Cut out circles with a floured 3-inch cutter. Re-roll and cut out the leftover dough. Cover the muffins with a damp cloth and let rest for about 20 minutes. 
  4. Heat a frying pan or griddle to medium low heat. Do not grease, but sprinkle with cornmeal. Cook four to six muffins at a time (whatever fits), cornmeal side down first, for about 7 minutes, covering the skillet for the first 7 minutes. Flip and  lower the temp to low, cooking uncovered for another 7 minutes.  Repeat until all muffins are cooked.
  5. Check after about 3 to 4 minutes to see that the muffins are browning gently and are neither too dark nor too light; if they seem to be cooking either too fast or too slowly, adjust the temperature of your pan or griddle. 
  6. This is what step four looks like, after they have been flipped
  7. When the muffins are brown on both sides, transfer them to a wire rack to cool, and proceed with the rest. If you have two frying pans (or a large griddle), you'll be better able to keep up with your rising muffins. 
Yield: 16 muffins.

Big pile of English muffin happiness!  They even look like the store bought, just better!

Nutrition information per serving, via King Arthur Flour (1 whole muffin, 2 halves, 59g): 140 cal, 3g fat, 4g protein, 23g complex carbohydrates, 1g sugar, 1g dietary fiber, 24mg cholesterol, 194mg sodium, 78mg potassium, 38RE vitamin A, 1mg iron, 77mg calcium, 55mg phosphorus.


Thursday, August 23, 2012

Hearty Crock Pot Chicken Noodle Soup

Pin It Now!

Nothing is more comforting then a hot bowl of homemade chicken noodle soup.  The only thing better is being able to throwing all the ingredients in the crock pot and having a delicious soup ready for dinner with no work.  This chicken noodle soup is choc full of veggies, chicken, and noodles, for hardly any calories per serving.  It is a great fill you up without filling you out meal.  It is a wonderful, simple, hearty soup.

Bonus:  It is one more way to use up the abundance of zucchini everyone seems to have laying around.

IF YOU LIKE THIS RECIPE, PLEASE DON'T FORGET TO PIN IT :)

Hearty Crock Pot Chicken Noodle Soup

Makes approximately 8-10, 8 oz. servings (about 1 cup)

Ingredients:
  • 20 oz. frozen boneless skinless chicken breasts
  • 1-1 lb. bag baby carrots
  • 3 medium zucchini
  • 3 large ribs of celery
  • 1 medium yellow onion
  • 4 oz. dried shaped pasta (I used shells)
  • 2 tsp dried oregano
  • 2 tsp dried basil
  • 1 tsp garlic salt
  • 1-2 tsp salt, to taste
  • 8 cups water or chicken broth or veggie broth
Directions:
  1. Chop the baby carrots into thirds, or just dice into smaller chunks.  Chop celery ribs into pieces similar to the carrots size, and do the same for the onion.  Cut the zucchini length wise in half and then cut half moon slices.
  2. Place all ingredients into the crock pot, except the salt and the dried pasta (the salt can be added at the end and adjusted to taste), and place on high for 6 hours.
  3. 30 minutes before you want to serve, remove the chicken, shred using two forks, and return to crock pot.  Pour in the dried pasta and let cook until desired tenderness is reached.
  4. Adjust the salt to taste and serve.

Wednesday, August 22, 2012

Nutella Dipped Frozen Banana Bites

Pin It Now!
Unfortunately, I still have even MORE bananas that need to be used. So more thinking ensued...what else is like chocolate and cookie butter?  NUTELLA! Everything is better with nutella. So I also made nutella dipped frozen banana bites with an oreo cookie crumble on top, because really, oreo's rock too! Since I have destroyed my teeth eating the whole chocolate dipped bananas I had, I have cut these into small pieces and put them on the sticks that I would have put the banana half on. Now they are much easier to eat and friendly on the teeth.

This is less a recipe, more a guideline, so I apologize, but it is kind of use what you need, and that's the right amount.  If you don't have a Trader Joe's where you live, then I am truly, truly, sorry.

IF YOU LIKE THIS RECIPE, PLEASE DON'T FORGET TO PIN IT :)

NUTELLA DIPPED FROZEN BANANA BITES

Ingredients:
  • ripe but not mushy bananas
  • nutella spread
  • Popsicle or lollypop sticks
  • a few oreos, crumbled
Directions:
  1. Line a baking sheet with parchment paper.
  2. Peel the desired amount of bananas and cut them into about 3/4" slices, discarding the very ends.
  3. Place banana slices onto popsicle or lollypop sticks by skewering them width wise. For the lollypop sticks I used, I fit 3 slices on each (See picture, left).
  4. Place them on the parchment lined tray and freeze for an hour at least.
  5. When ready, scoop out the nutella into a shallow bowl. If needed, microwave for 10 seconds, or until it is slightly runny.
  6. Using a knife, spread the nutella on all sides of the bananas and place back on tray. If the spread will not stay on, the bananas need to go back in the freezer for a while.
  7. Before it hardens, sprinkle the bananas with crushed oreo crumbs to coat.
  8. Place back in freezer until hardened, and then store in freezer until ready to eat. Once they are frozen solid, they can be wrapped in parchment or wax paper and put in a ziploc bag to keep them fresher


BETTER Baked Donuts w/ Gingerbread Glaze

Pin It Now!


Forget about the last baked donut recipe I posted.  Delete it.  Unbookmark it.  Unpin it.  Seriously. :)

This is SOOOOOOO much better!!  After much trial and error, I have been able to make a BAKED donut that is soft and light and airy and tasty!!  This one is much less roll like, much more Krispy Kreme donut like.  As for the gingerbread glaze, it is made with cookie butter, from Trader Joe's.  I am still finishing up the jar from the frozen bananas and the macaron filling.  And there might be the fact that the gingerbread flavor just screams "holidays" and "cooler days" in my head...both of which I would love to be here now.

These are really quite easy, makes probably about 18-24, 3" donuts and the holes that go with them.  There is a good amount of sugar and butter though, so rising times may take much longer unless you are using SAF gold yeast for sweet breads.  Don't worry about it, just let them rise until the dough has met whatever stage of rising indicated, no matter if its 45 minutes or 2 hours, it all depends on the conditions and temperature of your kitchen and the yeast you use.  If you want to use the maple glaze from the last donut recipe that you can find here or a different one all together, feel free to leave out the cinnamon and nutmeg.

One last thing:  If you are a cookie butter fanatic like some I know, then just forgo making the glaze and just spread the straight cookie butter right on the warm donuts.  Heaven!

**At the bottom of this recipe I have included the Maple Glaze Recipe for those that don't want, or can't get cookie butter.  The maple glaze is to die for, so you aren't trading down, don't worry.

IF YOU LIKE THIS RECIPE, PLEASE DON'T FORGET TO PIN IT :)


Baked Cookie Butter Glazed Donuts


*Note: These little beauties are best made and eaten the same day, preferably warm right from the oven. The great news is that you can make the dough, roll and cut out the doughnuts the night before and let them do their second rising in the fridge, covered. Remove them from the refrigerator and put them on the counter about an hour before baking. I used instant yeast in the recipe. If you only have active dry yeast on hand, proof the yeast with 1/3 cup of the warm milk and the sugar until it is foaming before adding in the rest of the milk and proceeding with the recipe.


*Makes about 1 1/2 to 2 dozen doughnuts/doughnut holes

INGREDIENTS:

Doughnuts:

  • 1 1/3 cups warm milk, 95 to 105 degrees (I used soymilk, so sub as needed)
  • 1 Tbs. instant yeast
  • 6 tablespoons butter, softened
  • 2/3 cup granulated sugar
  • 2 large eggs, lightly beaten
  • 1/2 cup fat free greek yogurt
  • 2 1/2 cups all-purpose flour
  • 2 1/2 cups whole wheat pastry flour
  • 1/4 tsp nutmeg, ground  (optional, leave out if doing a different flavored glaze if you don't want competing flavors)
  • 1/2 tsp ground cinnamon (optional, leave out if doing a different flavored glaze if you don't want competing flavors)
  • 1 teaspoon salt


Cookie Butter Glaze**:

  • 1 1/2 cups powdered sugar
  • milk, soymilk, cream, enough to thin the glaze to desired consistency
  • 1/2 cup cookie butter (from Trader Joe's)


Directions:

  1. Place the warm milk in the bowl of an electric mixer. Stir in the yeast and sugar. Add the butter and yogurt. Mix in the eggs, flours, nutmeg (optional), cinnamon (optional), and salt. Beat the dough with the dough hook attachment (or with a wooden spoon and eventually your hands) for 2-3 minutes at medium speed. Adjust the dough texture by adding flour a few tablespoons at a time or more milk. The dough should pull away from the sides of the bowl and be very soft and smooth but still slightly sticky – don’t over flour! Knead the dough for a few minutes (again, by mixer or by hand) and then transfer the dough to a lightly greased bowl.  The dough has been kneaded enough when it is quickly poked and the remaining indentation starts to spring back and disappear slightly. Cover the bowl and let the dough rise for about an hour or until it has doubled in size (the exact time will depend on the temperature of your kitchen). 
  2. If you don't have a mixer, this can be done by hand.  Mix all ingredients thoroughly and knead for 5 minutes by hand.
  3. Punch down the dough and roll it out to about 1/2-inch thickness on a lightly floured counter. Using a doughnut cutter or a 3 inch circle cookie cutter, cut out circles in the dough (I used a 3 inch cutter and a 1 inch cutter). Carefully transfer the circles to a parchment- or silpat-lined baking sheet and stamp out the smaller inner circles using a smaller cutter. Be sure to make the holes large enough that as the doughnuts rise again and bake, they don’t fill in the doughnut hole with the puffiness of the dough. Cover the tray with lightly greased plastic wrap (I did not do this and they still came out fine, your choice). (At this point, you can refrigerate the doughnuts overnight or proceed with the recipe.) Let the doughnuts rise for about another 45 minutes, until they are puffed and nearly doubled. 
  4. Bake in a 375 degree F oven until the bottoms are just golden, 8 to 10 minutes. Start checking the doughnuts around minute 8. They should still be pale on top, not golden and browned, and just barely baked through.
  5. Glaze: Place the cookie butter in a medium microwave safe bowl and microwave 15 seconds until warm and runny.  Mix in the powdered sugar and enough milk to thin the mix to a glaze consistency, fairly thin.
  6. Remove the doughnuts from the oven and let cool for 1-2 minutes. Dip each one in the glaze or sprinkle with the cinnamon and sugar. Serve immediately.

**Maple Glaze:


3 Tbs. butter
1/2 cup packed brown sugar
1/4 half and half (I used 2% evaporated milk, worked great)
1 Tbs. real maple syrup
1 1/2 cups powdered sugar

Maple Glaze: In a medium sauce pan combine the brown sugar and butter and bring to a boil.  Add maple syrup and cook over medium heat for 1 minute until slightly thickened, stirring constantly. Remove from heat.  Add cream slowly and mix until smooth.  Add powdered sugar and stir until powdered sugar is dissolved and glaze is smooth.  Dip donuts immediately while it is still warm and runny.  If it sets up, heat it again on low heat until it is spreadable. 

Cookie Butter Dipped Frozen Banana Bites

Pin It Now!
 
I have so many over ripe bananas on my counter it is depressing. I don't want any more muffins or bread or cookies in my house right now either (OK, I do, but I shouldn't have it here). After making my macarons I had half a jar of cookie butter left over. In case you have never heard of it (I hadn't until very recently), it is carried by Trader Joe's, and it has the consistency of peanut butter, but the taste of gingerbread cookies. It is like it is named--cookie butter. Putting my thinking cap on, I was trying to figure out what I could do that maybe would use both things, and while I was thinking about it I went to my freezer and grabbed the last chocolate dipped frozen banana from my son's 3rd birthday party. Then it hit me! Cookie butter dipped frozen banana bites! Too add a bit more dimension I also decided that a bit of crushed graham cracker would make a nice topping to them (because frankly, a dipped banana with nothing else on it is just kind of dull). Thus was born the cookie butter dipped frozen banana bites!

IF YOU LIKE THIS RECIPE, PLEASE DON'T FORGET TO PIN IT :)

COOKIE BUTTER DIPPED FROZEN BANANA BITES

Ingredients:
  • ripe but not mushy bananas
  • cookie butter (found at Trader Joe's)
  • Popsicle sticks or lollypop sticks
  • a few graham cracker sheets, crushed
Directions:
  1. Line a baking sheet with parchment paper.
  2. Peel the desired amount of bananas and cut them into about 3/4" slices, discarding the very ends.
  3. Place banana slices onto popsicle or lollypop sticks by skewering them width wise.  For the lollypop sticks I used, I fit 3 slices on each (See picture, left).
  4. Place them on the parchment lined tray and freeze for an hour at least.
  5. When ready, scoop out the cookie butter into a shallow bowl and microwave for 10 seconds, or until it is slightly runny.  
  6. Using a knife, spread the cookie butter on all sides of the bananas and place back on tray.  If the spread will not stay on, the bananas need to go back in the freezer for a while.
  7. Before it hardens, sprinkle the bananas with crushed graham cracker crumbs to coat.
  8. Place back in freezer until hardened, and then store in freezer until ready to eat.  Once they are frozen solid, they can be wrapped in parchment or wax paper and put in  a ziploc bag to keep them fresher.
 
.

Tuesday, August 21, 2012

Chocolate Chip Butterscotch Pretzel Cookies

Pin It Now!

Sweet, salty, chewy, crunchy, chocolatey, savory, butterscotchy, and just plain addictive.  That is how I will describe what is probably my most favorite version of chocolate chip cookies.  I know you may think that adding pretzels to chocolate chip cookies may seem way too weird to try, but think about it for a second--salted caramel is all the rage right now, think of it like that.  The pretzels add a pleasant burst of saltiness and a suprising little crunch every so often.  It is heavenly.  Try them.  Try them please!  They will change your thoughts on chocolate chip cookies forever.

These are dangerous to have in my house, I love them so much.  The freeze beautifully, so I am putting my batch in the freezer to 1) slow down my consumption (out of sight out of mind) and 2) keep them fresh for a long time.

IF YOU LIKE THIS RECIPE, PLEASE DON'T FORGET TO PIN IT :)

CHOCOLATE CHIP BUTTERSCOTCH PRETZEL COOKIES

Makes between 40-46 cookies

Ingredients:
  • 2 sticks of butter (1 cup), softened
  • 1 cup brown sugar, packed
  • 1 cup granulated sugar
  • 2 eggs
  • 1 Tbs. vanilla extract
  • 3 cups all purpose flour
  • 3/4 tsp. salt
  • 3/4 tsp. baking soda
  • 6 oz. semi sweet chocolate chips
  • 6 oz. butterscotch chips
  • 1.5 oz mini pretzels or thin pretzel sticks, broken into bite sized pieces
Directions:

  1. Preheat oven to 375 degrees F.  Line a baking sheet with parchment paper.
  2. In a medium bowl combine brown sugar, granulated sugar, and butter and cream together with a hand mixer until well combined.
  3. Add eggs and vanilla and mix thoroughly.
  4. Add flour, salt, and baking soda and mix well.
  5. Pour in chocolate chips, butterscotch chips, and pretzel pieces and combine by hand or with mixer.
  6. Using a #40 cookie scoop (1 1/2 Tbs.), drop onto prepared pan, about 12 cookies, 2 inches apart.
  7. Bake for 9-11 minutes until they start to brown on the edges.  They will still look a bit light in the center, but will darken and firm up when they cool. 

Sunday, August 19, 2012

Sweet Confessions Sunday Link Party #3

Pin It Now!
Sweet Confessions Sunday Link Party #3

Thank you so much to everyone who contributed to last weeks link party!  There were so many wonderful submissions by great blogs, I am so excited!  It is growing leaps and bounds by the week and it puts such a smile on my face to see how much support everyone in the blogging world gives to others.  Before we start the party though,  let's look at this weeks Sunday Sweet Links Spotlight posts:

Sunday's Sweet Links Spotlight

Strawberry shortcake ice cream from Wonky Wonderful made with fresh strawberries and Twinkies.  There is so much right with that statement I don't know where to start, except to say I now have to go to the store to get some Twinkies because I MUST make this ASAP.

Picture 

Check out this tri-fecta of  sweet happines with Moore or Less Cooking's Groovy Caramel Bars.


Look at this fantastic idea for a motorcycle enthusiast's birthday from The Mandatory Mooch.  So cool!


Cheesecake and brownies and cookies, Oh My!  Yep, all in one wonderful place at The Recipe Critic with these chocolate chip cheesecake brownies.  How can you go wrong with this combo??   


Saturday, August 18, 2012

Personal Apple Pie Cheesecakes with Caramel Sauce

Pin It Now!

Warning:  I am pretty darn proud of how these turned out, so I am going to shamelessly photo-bomb this post with pictures of the cheesecake.  You have been warned.  You will either need to deal with it or stop reading it right now :)

All right, now that is out of the way.  

I warned you....Lots of pictures :)
This weekend is my mother-in-law's birthday.  Her favorite dessert as far as I have been informed of is cheesecake.  Sadly, since that is the case, I usually make her the same cheesecake every year.  This year, I decided to take the extra time and rack my brain for any variations on cheesecake that I thought would make it a little bit more special for her.  I knew she liked caramel, and apple pie, so I thought about how I could integrate those things into her favorite dessert, and still have it be something that would turn out OK.  This is what I came up with.  Not too shabby if I do say so myself.  I like to make things so that she can freeze them or partition then out so that it lasts longer, so I thought I would find another use for my wonderful King Arthur Flour hamburger bun pan (which I LOVE), and make personal size cheesecakes in it.  Since it isn't a spring form pan, I cut strips of parchment paper and laid two crossed over each other in each well of the pan for (hopefully) easy removal.  See the picture below. 

Love love love my King Arthur Flour hamburger bun pan.  Nothing sticks and it cooks beautifully and can be used for so so so many things!
Close up of the parchment tabs and cooked cheesecake.

This is what they looked like after they were baked.  I stuck them in the fridge after they cooled on the counter for a while, and when I tried to pull one out this morning, I just lifted by the parchment paper pieces and it came right out.
When life hands you extra cheesecake batter....for goodness sake don't waste it! Make more crust and bake it in something!
It ended up making so much filling that I quickly made a second batch of crust, did the same thing with a 9" round cake pan (once again, not a spring form, so I used parchment strips, just a lot more of them), and ended up dumping the rest of the batter in to this.  It was exactly the perfect amount.  As you can tell, this makes a ton, but it will depend on what you decide to bake it in.

I know cheesecake can be intimidating, but I promise, it is fairly forgiving, specially if you are not  concerned with a little cracking on top, which will not affect flavor in any way.  Give it a try, it is worth it.  I will give some notes on different pan ideas at the end of the recipe, and a few different baking options depending on the pan you use. 

If You Like It, Please Pin It!

Personal Apple Pie Cheesecakes with Caramel Sauce
(This recipe will make 12 personal size ones done in a hamburger bun pan that has 1 1/2" deep wells that are 4" across)*

Ingredients:

Crust:
  •  4 cups ground graham crackers (about 1 box)
  • 1 tsp cinnamon
  • 2 sticks of butter (1 cup)
  • 3 Tbs granulated sugar
Filling:
  • 2 (8 oz.) blocks neufchatel cheese (light cream cheese), softened
  • 3 eggs, room temperature
  • 2 cups fat free plain greek yogurt
  • 1 tsp. ground cinnamon
  • 1/2 tsp. vanilla extract
  • 1/4 tsp. ground nutmeg
  • 1 cup granulated sugar
  • 1 can apple pie filling
Caramel Sauce:
  • 1 1/2 cups granulated sugar
  • 1/4 cup water
  • 3/4 cup 2% evaporated milk
  • 1/2 tsp vanilla
Directions:

Crust:
  1.  Preheat the oven to 325 degrees F.
  2.  In a mixing bowl, combine the ingredients with a fork until evenly moistened. Lay two parchment strips across each other in each well of the pan to form an X.
  3. Spoon the crumbs into the pan wells and, using the bottom of a measuring cup or the smooth bottom of a glass, press the crumbs down into the base and up the sides (the paper may curl in on it, but once you get the crumbs pressed in, it should hold the paper open more). 
  4. Bake in oven for 6 minutes.  Remove and let cool slightly. 
  5. Place about a tablespoon of apple pie filling in the bottom of each well, on top of the baked crust, and spread to cover the bottom.
Filling:
  1. In  a large bowl, using a hand mixer, beat the neufchatel cheese on low speed for 1 minute until smooth and free of any lumps. Add the eggs, 1 at a time, and continue to beat slowly until combined. Gradually add sugar and beat until creamy, for 1 to 2 minutes (the higher speed you beat it on, the lighter the cheesecake will be, so if you want a dense cake, beat on low speed for the minimum amount of time needed to fully incorporate ingredients)
  2. Add greek yogurt, cinnamon, nutmeg, and vanilla. Mix well.  Periodically scrape down the sides of the bowl and the beaters. The batter should be well-mixed but not over beaten. Pour the filling into the apple pie filling covered, crust-lined pan wells, most of the way full.
  3. Place in oven.  Bake for about 30 minutes. The cheesecake should still jiggle in the center just a bit (it will firm up after chilling), so be careful not to overcook.  Remove from oven.  Let cool in pan for 30 minutes. Chill in the refrigerator, loosely covered, for at least 4 hours. Remove from pan by lifting the cheesecake out by the parchment strips slowly and gently.
Caramel Sauce:
  1. Place sugar and water in a medium sauce pan and bring to a boil heating on high. 
  2. Boil on high until the sugar dissolves and eventually turns a deep amber color, swirling occasionally to distribute the color, but do not stir. About 10-12 minutes
  3. Once desired color is attained, remove from heat and CAREFULLY add the evaporated milk.  It will boil violently, release hot steam, and sputter, so be carefully and add slowly.  Stir constantly until all the milk is added and it has stopped boiling and is well incorporated.  Add vanilla and mix.
  4. Let cool in pan.  Once it is cool enough to handle, spoon over refrigerated cheesecake as desired.  
  5. Store remaining in fridge in air tight container for up to a week.  Reheat in microwave to make it pourable.
Rarely, if ever, have I had pictures come out of my food that I like.  I like.


*Notes:
  • If you don't have a deep welled hamburger bun pan, similar sized ramikins can be used.  Use the same parchment paper technique for easy removal.  Regular sized muffin pans can be used too, it will probably make about 24 of them.  Two 9" cake pans (about 2-3" deep) can also be used.  When filling up anything for cheesecakes, it will rise so do not fill all the way to the top.
  • The 9" cake pan baked for about 45-50 minutes, if you decide to go that route.
  • If you have a spring form pan, by all means, use it.  You can cut the crust recipe in half if you have a 9 or 10" spring form pan and just want to make one large cheesecake.
  • I know the best way to bake a cheesecake is to do it in a water bath, but I did not have a pan that would fit my hamburger bun pan in so I opted to do the method of baking at a slightly lower temperature.  The personal sized cheesecakes had no cracking problems on top what so ever.  The large one started cracking on the top around the edges slightly by the end, but after it cooled, they sealed up and you can't tell.  We are smothering it with caramel sauce, so what difference does it make anyways?  The cheesecake came out wonderfully creamy, so if you don't have a pan for a water bath, don't worry.  I am trying to make this as user friendly as possible.
  • If your dissolved sugar mixture is really grainy by the time it starts to get some color, add 1/2 cup of water to it and stir to dissolve the sugar, return to a boil and continue with the recipe.  You can also add a bit of corn syrup to help also. 
  • If you have never made a cheesecake, they look a bit undercooked when they are done, a bit wiggle still in the center.  It is ok.  It will set up in the fridge the rest of the way.  Just make sure it wiggles like jello, and not like a bucket of water being shaken (too loose).
  • This cheesecake is much lower in fat and calories than regular cheesecake so it will be creamier band lighter.  Less guilt on going back for seconds I say!

Last one, I promise.
 Feel free to leave any questions in the comments section.  If I don't have an answer, I will try to find it for you from someone else who does.

Enjoy, and let me know if you make it how you like it!


Thursday, August 16, 2012

Baked Maple Glazed Yeast Donuts

Pin It Now!

FYI:  I HAVE A BETTER BAKED DONUT RECIPE HERE


Mmmmm donuts!  I love the taste of donuts.  I hate the way I feel after I eat them.  Too much grease I guess.  I really wanted to try doing yeast raised donuts at home, but just couldn't stomach the thought of frying them, at least not until I tried out baked donuts to see if they come close enough to satisfy my donut cravings.  Baked donuts that taste like Krispy Kreme donuts.  That is the mecca of donut happiness and one of my many baking missions.  As such, I am sure there will be many donut posts along the way as I do my research.  

These baked donuts from Mel's Kitchen Cafe are pretty easy, and they taste pretty darn good for being baked.  I will put the disclaimer out there though that these are NOT going to be like fried donuts.  They just aren't.  They are more like a donut-like roll.  My favorite part of a donut is the the maple glaze, so for me, they were an excellent carrier for my maple glaze recipe.  Anyways, I think they are worth it to not have the yucky, greasy feeling after eating them, and to not have to heat up oil makes them very appealing.  Just saying though, you have been warned.

Obviously you can do many things to top these donuts, like I said earlier, I am partial to maple glazed donuts so that is what I did.  You can also roll them in cinnamon-sugar, coat them in a vanilla glaze, top them with glaze and sprinkles...lots of options.  Here is one way.

Baked Doughnuts
(Donut dough recipe from Mel's Kitchen Cafe)
 

*Note: These little beauties are best made and eaten the same day, preferably warm right from the oven. The great news is that you can make the dough, roll and cut out the doughnuts the night before and let them do their second rising in the fridge, covered. Remove them from the refrigerator and put them on the counter about an hour before baking. I used instant yeast in the recipe. If you only have active dry yeast on hand, proof the yeast with 1/3 cup of the warm milk and the sugar until it is foaming before adding in the rest of the milk and proceeding with the recipe.

*Makes about 1 1/2 dozen doughnuts/doughnut holes

INGREDIENTS:

Doughnuts:

1 1/3 cups warm milk, 95 to 105 degrees (I used soymilk, so sub as needed)
2 teaspoons instant yeast
2 tablespoons butter
2/3 cup granulated sugar
2 large eggs
5 cups all-purpose flour
A pinch or two of nutmeg, freshly grated (optional, leave out if doing a flavored glaze if you don't want   competing flavors)
1 teaspoon salt

Topping:


Maple Glaze:

3 Tbs. butter
1/2 cup packed brown sugar
1/4 half and half (I used 2% evaporated milk, worked great)
1 Tbs. real maple syrup
1 1/2 cups powdered sugar


DIRECTIONS:
Donuts before second rising
  1. Place the warm milk in the bowl of an electric mixer. Stir in the yeast and sugar. Add the butter. Mix the eggs, flour, nutmeg (optional), and salt. Beat the dough with the dough hook attachment (or with a wooden spoon and eventually your hands) for 2-3 minutes at medium speed. Adjust the dough texture by adding flour a few tablespoons at a time or more milk. The dough should pull away from the sides of the bowl and be very soft and smooth but still slightly sticky – don’t over flour! Knead the dough for a few minutes (again, by mixer or by hand) and then transfer the dough to a lightly greased bowl. Cover the bowl and let the dough rise for about an hour or until it has doubled in size (the exact time will depend on the temperature of your kitchen). 
  2. If you don't have a mixer, this can be done by hand.  Mix all ingredients thoroughly and knead for 5 minutes by hand.
  3. Punch down the dough and roll it out to about 1/2-inch thickness on a lightly floured counter. Using a doughnut cutter or a 2-3 inch circle cookie cutter, cut out circles in the dough (I used a 3 inch cutter and a 1 inch cutter). Carefully transfer the circles to a parchment- or silpat-lined baking sheet and stamp out the smaller inner circles using a smaller cutter. Be sure to make the holes large enough that as the doughnuts rise again and bake, they don’t fill in the doughnut hole with the puffiness of the dough. Cover the tray with lightly greased plastic wrap. (At this point, you can refrigerate the doughnuts overnight or proceed with the recipe.) Let the doughnuts rise for about another 45 minutes, until they are puffed and nearly doubled. 
  4. Bake in a 375 degree F oven until the bottoms are just golden, 8 to 10 minutes. Start checking the doughnuts around minute 8. They should still be pale on top, not golden and browned, and just barely baked through.
  5. Maple Glaze: In a medium sauce pan combine the brown sugar and butter and bring to a boil.  Add maple syrup and cook over medium heat for 1 minute until slightly thickened, stirring constantly. Remove from heat.  Add cream slowly and mix until smooth.  Add powdered sugar and stir until powdered sugar is dissolved and glaze is smooth.  Dip donuts immediately while it is still warm and runny.  If it sets up, heat it again on low heat until it is spreadable. 
  6. Remove the doughnuts from the oven and let cool for 1-2 minutes. Dip each one in the maple glaze or sprinkle with the cinnamon and sugar. Serve immediately.

Wednesday, August 15, 2012

Double Chocolate Zucchini Brownies

Pin It Now!

Sometimes what my toddler will eat surprises the heck out of me, like the fact that he has beef jerky radar and will be my husbands best and most attentive friend the moment that package opens.  Unfortunately when it comes to vegetables, his likes are limited to peas (definitely did not get that from me) and corn (I use the term vegetable very loosely).  He did however get blessed with my sweet tooth (sorry kiddo).  When I saw the recipe for Triple Chocolate Zucchini Brownies from Sweet Pea's Kitchen, I thought that maybe I could sneak some veggies in him (and my husband and I) that way instead. 

I did not have white chocolate chips, nor do we really like nuts in our brownies, so hence the "double" instead of "triple" chocolate brownie.  I am posting the recipe exactly as written from Sweet Pea's Kitchen though, because why mess with a good thing if you don't have to.

I made these in a 9x13 and cut them into 24 brownies just to make the calories less per serving.  Do whatever works for you, I am just used to thinner brownies.  They came out absolutely the most moist brownies I have ever had, were wonderfully chocolatey, and the zucchini was hardly noticeable, if at all.  I would love to freeze them and try them, I think it would awesome and extra fudgey that way too.  My son liked them and never said anything about anything green in them :)  If you have some zucchini laying around and a terrible chocolate tooth like me, this is the best of both worlds! Another win for Sweet Pea's Kitchen!

P.S.- Don't worry if you mix all the ingredients together (before adding the zucchini) and it is a very stiff paste.  Once you add the zucchini, there is so much moisture in them that a minute of stirring and you will have something that resembles the brownie batter we all know and love.

Triple (or Double) Chocolate Zucchini Brownies
(From Sweet Pea's Kitchen)
 
Ingredients:
  • 1 cup all-purpose flour
  • 1/4 cup unsweetened dark cocoa powder
  • 1 ½ teaspoons baking soda
  • 1/4 teaspoon salt
  • 1/4 teaspoon allspice
  • 1/4 teaspoon cinnamon
  • 1 large egg
  • 1 cup sugar
  • 2 teaspoons vanilla extract
  • 1/4 cup vegetable oil
  • 2 cups shredded zucchini (leave the skin on and use the small holes of the grater)
  • 1/2 cup chopped walnuts
  • 1/2 cup white chocolate chips
  • 1/2 cup semisweet chocolate chips
Directions:

  1. Preheat oven to 350F. Butter the bottom and sides of an 8X8 inch metal baking pan (or a 9x13 for thin brownies). Put a long piece of parchment paper in the bottom of the pan, letting the parchment extend up two sides of the pan and overhang slightly on both ends. Place another piece of parchment paper in the same manner, perpendicular to the first sheet. (This will make it easy to remove the bars from the pan after they have baked.)
  2. In a medium bowl, whisk together the flour, cocoa powder, baking soda, salt, allspice and cinnamon; set aside.
  3. In a large bowl, whisk together the egg, sugar, vanilla, and oil until combined, about 15 seconds. Stir in the flour mixture until just combined (batter will be thick). Fold in the zucchini, walnuts, white chocolate and semisweet chocolate chips. Pour mixture into prepared pan, spread into corners, and level surface with rubber spatula; bake until slightly puffed and toothpick inserted in center comes out with a small amount of sticky crumbs clinging to it, 35 to 40 minutes (about 32 min for 9x13). Cool on wire rack to room temperature, about 2 hours.
  4. Using parchment overhang, lift brownies from pan. Cut into squares and serve.
Yields: 16 brownies (or 24 thin brownies from the 9x13)
Related Posts Plugin for WordPress, Blogger...