Friday, December 7, 2012

Easy Apple Pie Turnovers

Pin It Now!

My son spent all of yesterday asking for pop tarts.  He has never had a store pop tart, and I wasn't going to go buy him one.  I decided I would try a homemade pop tart with some puff pastry I had leftover in my freezer from the last time I made puff pastry.  I know he likes apple, so I made it easy on myself and used the can of apple pie filling I had in my cupboard (I know, I know, you can make it from scratch, but hey, I made the pastry part, and they are called "easy," so something has to give).  I searched for homemade pop tart recipes and came across Smitten Kitchen's recipe.  I used it as a guide and inspiration more than anything, but it is always nice to have a plan.   Once I made them, I decided that no matter how I worded it, I just could not legitimately call these pop tarts.  The crust was just too puffy and flaky and buttery.  So, I opted for the more likely accurate description of turnover.

So, after all the work I put into making these , I presented my son with one this morning, very excited for him to exclaim that this is the best thing he ever had, and instead he turned his nose down at it and proclaimed his dislike for pop tarts.  Crushed me, totally crushed me! And then later my husband tried one, said they were amazing, and the world was right again.  I had one, and yes, they are pretty fantastic.

I made this with my easy puff pastry recipe from a previous post, but of course, if you have frozen store bought dough, then use what you've got of course. 

Before being drizzled in sugary glaze goodness

EASY APPLE PIE TURNOVERS
(Inspired by Smitten Kitchen's Homemade Pop Tarts)

Makes 12 turnovers if the whole batch of puff pastry is used.

Ingredients: 
  • 1 recipe Easy Puff Pastry (Scroll down towards the bottom of the post for this link), (Thaw it in the fridge for several hours to overnight if frozen, or if refrigerated, leave it out for 15 minutes to soften slightly)
  • 1 can apple pie filling
  • 1 egg, beaten
  • 1 recipe for Vanilla Glaze (See below)  
VANILLA GLAZE  
(Adapted from King Arthur Flour's Simple Cookie Glaze)
  • 2-1/2 cups powdered sugar
  • 1-2 teaspoons vanilla extract, to taste
  • 2-3 tablespoons apple juice, for desired consistency
  • 2 tablespoons light corn syrup  
Directions:
  1. Line a baking sheet with parchment paper.  Lightly dust with flour.  Place half of the puff pastry dough on the baking sheet.  Using a rolling pin, roll out in to a rectangle approximately 10 x 15 inches (it will be maybe 1/8 inch thick or thinner).  
  2. Using a pastry wheel, knife, or pizza cutter, trim the edges to form a nice rectangle, and then cut into four strips width wise, and three strips length wise, to form 12 squares.  
  3. Using the beaten egg, brush all the squares with the egg wash.
  4. Using a knife, I chop the apple pieces in the pie filling into smaller pieces, right in the can.  Using a tablespoon, start with a half tablespoon's worth of filling, and place it in to the center of 6 of the squares.  If it looks like it can hold a little bit more, than go ahead and add it.
  5. Place an unfilled pastry piece, egg wash side down, onto a filled piece.  Repeat for all pieces.
  6. Spread the pastries apart as necessary, and then using a fork, crimp all the way around the edges to seal.
  7. Using a toothpick or fork, poke several holes in the top of the pastry for the steam to escape.
  8. Repeat steps 1-7 for the second half of the puff pastry dough and place the finished turnovers all one one baking sheet, or keep on two separate ones.  
  9. Brush all the turnovers with more egg wash and place the tray in the freezer for 30 minutes.
  10. Preheat the oven to 350 degrees F.
  11. After 30 minutes, place the tray(s) into the oven for 22-27 minutes, or until golden brown and puffy.
  12. Make the glaze:  In a bowl mix the powdered sugar, vanilla, and corn syrup.  Add the apple juice one tablespoon at a time, until the desired consistency is reached for the glaze.  
  13. After the turnovers come out of the oven and have cooled slightly, drizzle with glaze, and enjoy warm.
  14. Store remaining pastries (if there are any left) in the fridge. 

Wednesday, December 5, 2012

Challah Bread

Pin It Now!

We LOVE bread in my family.  I am always looking for new ones to try.  While browsing my facebook news feed I saw a post for a lovely challah bread.  The baker inside me was inspired to make this beautiful bread, so I took off to my favorite bread baking site, King Arthur Flour, and sure enough, they have a lovely Classic Challah bread recipe.  I had received some Red Star Platinum yeast as a freebie a month or two ago, and had been saving it for a sweeter bread, and decided to give it a go.  My husband saw it as I was putting it in the oven, and was so excited, he is a huge fan of challah bread, and couldn't believe I was giving making it a try.  That made me very happy to see him so enthusiastic about it.  Now the pressure for it to turn out was really on though :)

This dough was very stiff, even though I measured everything by weight, and in hindsight I should have added a tad bit more water probably.  It was around 72 degrees F. today in my house, and after 3 hours it hadn't really risen at all.  I warmed up the oven, then put it in there and let it rise another 45 minutes, and it finally got puffy.  probably not doubled, but enough.  I proceeded with the recipe, and it worked perfectly fine.  I think my kitchen was just too cold.


This is the most beautiful bread I think I have ever made, and the flavor reminded me of the King's Hawaiian Sweet Rolls, just like 1,000 times better.  I am in love with this bread.  Slightly sweet, lovely crust, and incredibly tender and light inside.  Can not go wrong!  I did not alter the recipe hardly at all, except for the addition of diastatic malt powder to help with the rising, and some sesame seeds on top, because my husband loves sesame seeds on his bread.  I also left the directions as written on King Arthur Flour's recipe (see link under the title for the original recipe and more pictures), because I want to make sure that you all get the best information and directions for making this labor of love.


I don't know a great deal about the history and significance of this bread, other than it is significant for Jewish holidays, but I will be looking into it much more now that I know about it a bit better.


CHALLAH BREAD
(From King Arthur Flour's Classic Challah)

Ingredients:

Dough


Glaze


  • 1 large egg beaten with 1 tablespoon cold water
  • Sesame seeds or poppy seeds (optional)
Directions:
  1. To make the dough: Combine all of the dough ingredients and mix and knead them, by hand, mixer, or bread machine, until you have a soft, smooth dough.
  2. Allow the dough to rise, covered, for about 2 hours, or until it's puffy and nearly doubled in bulk.
  3. Gently deflate the dough, and transfer it to a lightly greased work surface. (Mine was very stiff, and took closer to 3-4 hours to even rise barely double, but it still all worked out.  Ended up sticking it in a warmed oven for the last 40 minutes and it finally started rising.)
  4. You may braid the challah the traditional way, into a three-strand braid. For a fancier presentation, make a four-strand braid, as follows (Check out KAF's Baking Banter for step by step directions and pictures) Divide the dough into four pieces, and shape each piece into a rough 6" log. Cover the logs with lightly greased plastic wrap or a proof cover, and let rest for 10 minutes.
  5. Roll each log into a 15" rope. Cover, and let rest for 10 minutes.
  6. Continue rolling the ropes til they're about 20" long; they'll shrink back to about 18" as they sit.
  7. Lay the strands parallel to one another, and pinch the ends on your left together.
  8. Take the rope nearest you, and move it up over the two adjoining ropes.
  9. Next, move the rope back under the rope next to it. Fan the ends of the ropes out again.  
  10. Repeat the process, but start with the rope farthest away from you. Bring it down and across the two adjoining ropes, and then back under the rope nearest it. Continue in this fashion, alternating which side you begin with, until you've braided the whole loaf. Pinch the loose ends together, and tuck them underneath the loaf.
  11. Gently pick up the loaf, and place it on a lightly greased or parchment-lined baking sheet.
  12. Cover the loaf with lightly greased plastic wrap or a proof cover, and let it rise till it's very puffy, 60 to 90 minutes. Towards the end of the rising time, preheat the oven to 375°F.
  13. Whisk together the egg and 1 tablespoon water, and brush this glaze over the risen loaf.  Sprinkle with sesame seeds or poppy seeds if desired.
  14. Place the baking sheet atop another baking sheet; this will insulate the bread's bottom crust, and keep it from browning too much. Put the challah in the lower third of the oven, and bake it for 20 minutes. 
  15. Tent the challah loosely with aluminum foil, and bake for an additional 25 minutes, until the loaf is golden brown.
  16. Remove the bread from the oven, and place it on a rack to cool.           

Tuesday, December 4, 2012

Candy Cane Oreo Fudge

Pin It Now!

I have been craving something chocolatey.  Like that luscious, smooth, melt in your mouth heavenly chocolatey.  After seeing a run of wonderful looking fudge recipes, I decided to venture into uncharted territories for me, and try my hand at fudge.  I did lots of research, called my mom and asked about her fudge recipe she has been using for as long as I can remember, and took to my favorite bloggers' sites.  What has resulted is kind of a mish-mash of parts of each of the recipes I saw, inspiration, if you will, for this recipe.

It turned out better than I could have ever hoped.  It was silky smooth fudge, studded with lovely little bits of oreo and candy cane pieces, and not overwhelming on the peppermint either.  Super easy to make, and just down right addictive.  


CANDY CANE OREO FUDGE
(Inspired by Something Swanky's Peppermint Oreo Fudge and highly adapted from Chocolate, Chocolate, and More's Milk Chocolate Fudge)

Ingredients:

Chocolate Oreo layer:
  • 3 cups semi sweet chocolate chips
  • 1 can sweetened condensed milk (14 oz)
  • 2 tsp vanilla extract
  • 2 cups broken up oreo cookies (left in reasonably large chunks)
  • 1/2 of a 7 oz. jar marshmallow fluff
White Chocolate Candy Cane Layer:
  • 3 cups white chocolate chips
  • 1 can sweetened condensed milk (14 oz)
  • 1/2 tsp peppermint extract
  • 1 cup crushed peppermint candy canes
  • 1/2 of a 7 oz. jar marshmallow fluff
Topping (optional):
  • crushed oreo cookies
  • crushed candy canes
Directions:
  1. Line a 9x13 baking dish with parchment paper and set aside.
  2. In a medium sauce pan over LOW heat, melt the semi sweet chocolate chips with the can of sweetened condensed milk.
  3. Once this is smooth and completely melted, remove from heat, add the vanilla extract and the marshmallow fluff and stir until completely combined.
  4. Add the oreo cookie pieces and stir until evenly distributed.  Pour into prepared pan and spread evenly over the bottom.
  5. In another sauce pan melt the white chocolate chips with the condensed milk until smooth and completely melted.
  6. Remove from heat and mix in the peppermint extract and the marshmallow fluff until well combined.
  7. Add in the candy cane pieces and mix until evenly distributed.
  8. Pour this mix over the chocolate oreo layer in the baking dish, and spread in an even layer.
  9. If desired, sprinkle with crushed oreo cookies or candy cane pieces, or both.
  10. Place in fridge until set, about 4 hours or over night.
  11. Cut in to pieces and enjoy.  Keep refrigerated.

Sunday, December 2, 2012

Honey Butter Pull Apart Rolls

Pin It Now!


I was browsing Pinterest's Food and Drink category as I often do when I want to get a good drool on, and I came across a pin for Honey Butter Pull Apart Rolls from High Heels and Grills.   I wanted to make some bread today, and after reading the recipe, I was sold!  Within 15 minutes of finding the recipe, I was already making the dough.  This recipe is easy to do, doesn't take too long, and the rolls are unbelievably light, soft, tender, tasty, and slightly sweet.  I am addicted.  I will make these for family gatherings, snacks, breakfasts, midnight munching, Christmas dinner...there is no event I wouldn't make these for.  I modified this recipe very, very little, I mean, how do you mess with perfection?

Make these.  Seriously.  Make them.

Lovely, super soft, light layers.
One more picture, because they are truly drool-worthy.
 HONEY BUTTER PULL APART ROLLS
(Slightly Adapted from High Heels and Grill's Honey Butter Pull Apart Rolls)

Makes 18 rolls

Ingredients:

  • 1-1/2 cups warm water
  • 1 Tbsp. instant yeast
  • 1 tsp. diastatic malt powder (optional)
  • 2 Tbsp. sugar
  • 2 Tbsp. vegetable oil
  • 1-1/2 tsp. sea salt
  • 3-1/2 to 4 cups all-purpose flour
  • 3 tablespoons salted butter, melted
  • 3 Tbsp. honey
  • 3/4 tsp. salt
Directions:
  1. In a large bowl, mix together water, yeast, diastatic malt powder (optional), sugar, oil, salt, and 3-1/2 cups of flour.  Using a spoon, your hands, or a stand mixer, mix until well combined (I just did this and the kneading by hand, worked great).
  2. Stir in more flour as need (1/4 cup at a time), until the dough has pulled away from the sides of the bowl, is no longer sticky, and you are able to work with it to knead it.
  3. Turn out onto a lightly floured surface and knead until fairly smooth and elastic, about 8 minutes, adding a tablespoon of flour or two if needed, to keep it from sticking.
  4. Place the dough back in the large bowl it was mixed in, spraying some non stick spray or lightly oiling the bowl before returning the dough to it.  Cover with a damp cloth; let rise in a warm place until doubled in size.
  5. After doubled, punch down dough and lay on floured surface. 
  6. Preheat oven to 375°F.
  7. Roll dough out until about 20 inches by 12 inches.
  8. In a small bowl, combine butter, honey, and salt.  Brush dough with half of the butter mixture.
  9. With a pizza cutter, cut dough lengthwise into sixths and crosswise into twelfths.  Make stacks of 4 dough squares and place each stack into a greased muffin tin cup.
  10. Brush with the remaining butter mixture.
  11. Let these rise until they are visibly puffier, about 20 minutes.
  12. Bake for 14-16 minutes or until golden brown. 
  13. Serve warm.

Saturday, December 1, 2012

Sunday's Sweet Confessions Link Party #17

Pin It Now!
Sunday's Sweet Confessions Link Party #17

Welcome everyone to this weeks link party! I am so happy you all were able to stop by and party with me.  This week, I am posting the Sweet Links Spotlight Featured Posts from last, last week's link party at the beginning of the party, so you don't need to go search for a separate post. Make sure to check out all the features, link up your posts, and visit some other links.  

 Last week's most clicked link: Crafty Journal's Easy Pocket Pies


Poised Perfection's Making Cloudy Glasses Sparkle
 

 Couponing and Cooking's Butterfinger Cake


 Ground Beef Budget's Pineapple Upside Down Cake
 

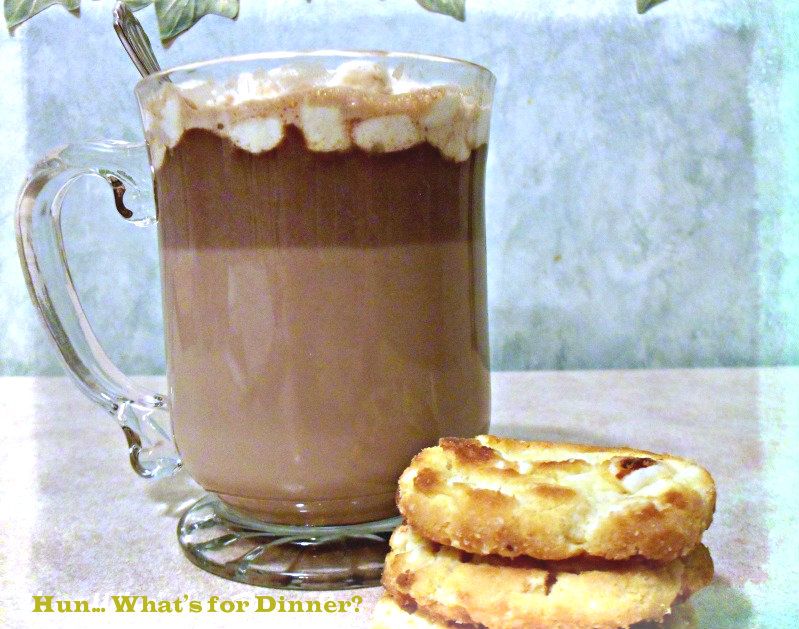
Hun, What's For Dinner's Mexican Nutella Hot Chocolate

 Hun... What's for Dinner?: Mexican Nutella Hot Chocolate

Thanks everyone for partying and entering your links, they were incredible!  All the featured links will be mentioned on Facebook, Twitter, and pinned on Pinterest!


If you were featured, grab yourself a button and post it proudly :)

Mommys Sweet Confessions

<a href="http://www.mommyssweetconfession.com" target="_self"><img src="http://i1067.photobucket.com/albums


/u427/Lindsay_Stotts/mommybutton_featured1.jpg" alt="Mommy's Sweet Confessions" width="150" height="150" /></a>

Related Posts Plugin for WordPress, Blogger...